No edit summary |
(Added Hypnocatrice) Tag: Visual edit |
||
| (43 intermediate revisions by 16 users not shown) | |||
| Line 1: | Line 1: | ||
| + | {{Location Infobox |
||
| − | {{MusicTheme |
||
| + | |Name = Desert |
||
| − | |video = <youtube width=70 height=25>_776Cj5EtHU</youtube> |
||
| + | |Image = QuestBG17.png |
||
| − | |title = '''MHFU: Desert Music Theme''' |
||
| + | |ENG Name = Desert |
||
| − | }} |
||
| + | |JPN Name = 砂漠 |
||
| + | |Area Icon = [[File:FieldIcon03.png|50px]] |
||
| + | |Number of Areas = 10 |
||
| + | |Hazards = Hot regions (Area 1, 2, and 5)<br />Cold regions (Area 1, 2, 5, and 6) |
||
| + | |Resources = Plants and Bugs |
||
| + | |Small Monsters = [[Apceros]], [[Cephalos]], [[Felyne]], [[Genprey]], [[Great Thunderbug]], [[Hermitaur]], [[Melynx]], [[Remobra]], [[Vespoid]] |
||
| + | |Large Monsters = [[Akura Vashimu]]<br /> [[Zenith Akura Vashimu]]<br /> [[Akura Jebia]]<br /> [[Barroth]]<br />[[Baruragaru]]<br /> [[Cephadrome]]<br /> [[Copper Blangonga]]<br /> [[Daimyo Hermitaur]]<br /> [[Plum Daimyo Hermitaur]]<br />[[Stonefist Hermitaur]]<br />[[Deviljho]]<br />[[Savage Deviljho]]<br />[[Diablos]]<br /> [[Black Diablos]]<br />[[Bloodbath Diablos]]<br /> [[Gendrome]]<br />[[Glavenus]]<br />[[Hellblade Glavenus]]<br />[[Gureadomosu]]<br /> [[Hypnocatrice]]<br />[[Hyujikiki]]<br /> [[Kuarusepusu]]<br /> [[Kushala Daora]]<br /> [[Lunastra]]<br /> [[Monoblos]]<br /> [[White Monoblos]]<br />[[Nibelsnarf]]<br />[[Odibatorasu]]<br /> [[Plesioth]]<br /> [[Green Plesioth]]<br /> [[Rajang]]<br /> [[Rathian]]<br /> [[Pink Rathian]]<br />[[Dreadqueen Rathian]]<br /> [[Rukodiora]]<br /> [[Seregios]]<br /> [[Teostra]]<br /> [[Tigrex]]<br /> [[Grimclaw Tigrex]]<br /> [[Zenith Tigrex]]<br /> [[Unknown (Black Flying Wyvern)]]<br />[[Valstrax]]<br />[[Volvidon]] |
||
| + | |Game Appearances = [[MH2]], [[MHF2]], [[MHFU]], [[MHFO]], [[MHGU]] |
||
| + | |Generation = [[Second Generation|Second]] |
||
| + | }}[[File:MHXX-Desert Map.png|Desert Map (MHXX)|thumb]] |
||
| + | [[File:MH2-Desert Day Map.png|Desert Day Map (MH2)|thumb]] |
||
| + | [[File:MH2-Desert Night Map.png|Desert Night Map (MH2)|thumb]] |
||
| + | [[File:Monster hunter freedom 2 desert.png|Desert Resource Map|thumb]] |
||
| + | The '''Desert''' is a location introduced in [[Monster Hunter 2]]. It is characterized by vast, sandy expanses, subterranean caves, and rocky, canyon-like areas. |
||
| + | The Desert is inhabited by many uniquely adapted monsters, such as [[Daimyo Hermitaur]], [[Diablos]], and [[Cephadrome]]. It returned in [[Monster Hunter Generations Ultimate]]. |
||
| + | ==Common Resources== |
||
| − | {{InfoBox-Area |
||
| + | {|class="wikitable" style="text-aligncenter; background-color:#EBEBEB; font-size:9pt;" |
||
| − | |JPName = (?) |
||
| + | !style="background-color:#3A5766; color:#ffffff;" |'''Resources''' |
||
| − | |KRName = (?) |
||
| + | !style="background-color:#3A5766; color:#ffffff;" |'''Areas found in''' |
||
| − | |image = [[Image:QuestBG17.png|250px]] |
||
| − | |areaicon = [[Image:FieldIcon03.png|50px]] |
||
| − | |numberareas = 10 |
||
| − | |hazards = Hot regions (Area 1, 2, and 5)<br>Cold regions (Area 1, 2, 5, and 6) |
||
| − | |resources = Cactus Flower |
||
| − | |smallmonsters = [[Genprey]], [[Felyne]], [[Melynx]], [[Apceros]], [[Remobra]], [[Great Thunderbug]], [[Vespoid]], [[Hermitaur]] |
||
| − | |largemonsters = [[Gendrome]], [[Cephadrome]], [[Rathian]], [[Pink Rathian]], [[Diablos]], [[Black Diablos]], [[Monoblos]], [[White Monoblos]], [[Daimyo Hermitaur]], [[Plum Daimyo Hermitaur]], [[Copper Blangonga]], [[Plesioth]], [[Green Plesioth]], [[Tigrex]], [[Kushala Daora]], [[Lunastra]], [[Teostra]], [[Kuarusepusu]], [[Rukodiora]], [[Odibatorasu]], [[Akura Vashimu]], [[Unknown (Black Flying Wyvern)]], [[Hyujikiki]], [[Baruragaru]] |
||
| − | |appearances = [[MH2]], [[MHF2]], [[MHFU]], [[MHFO]] |
||
| − | |generation = 2nd}} |
||
| − | |||
| − | |||
| − | [[Image:Monster hunter freedom 2 desert.png|Map of the Desert Area|thumb|right]] |
||
| − | The Desert Region features the most extreme and varying weather conditions in Monster Hunter 2. Like its predecessor, it incorporates both sandy and rocky areas. |
||
| − | |||
| − | =Geography= |
||
| − | Before embarking, pay attention to whether you will arrive at night or day! |
||
| − | |||
| − | The extreme weather conditions will severely handicap the unprepared hunter. The desert is extremely hot during the day and cold at night. |
||
| − | |||
| − | |||
| − | ==Base Camp== |
||
| − | |||
| − | As well as the Supply Box, the Delivery Box and the Rest Bed, there is a Well. |
||
| − | |||
| − | When you climb into the well it drops you directly down into Area 6. |
||
| − | |||
| − | |||
| − | ==Area 1== |
||
| − | |||
| − | |||
| − | Small pond to one end, surrounded by sand. |
||
| − | |||
| − | During the day it is very hot, bring '''Cool Drinks'''. During the night it is very cold, bring '''Hot Drinks'''. |
||
| − | |||
| − | [[Melynx]], [[Felyne]]s, [[Cephalos]], [[Apceros]] and [[Hermitaur]]s favour this area and are most at home here. |
||
| − | |||
| − | Many '''bugs''' and some '''fish''' can be caught here. '''Berries''' and '''plants''' also grow here. |
||
| − | |||
| − | '''Village 1-6 *''' |
||
| − | |||
| − | '''Gathering Hall 1-5 *''' |
||
| − | {| border="1" cellpadding="1" cellspacing="1" style="width: 550px;" |
||
| − | ! scope="col"|Berrys |
||
| − | ! scope="col"|% |
||
| − | ! scope="col"|Bugs |
||
| − | ! scope="col"|% |
||
| − | ! scope="col"|Plants |
||
| − | ! scope="col"|% |
||
| − | ! scope="col"|Fishing |
||
| − | ! scope="col"|% |
||
| − | ! scope="col"|Bugs |
||
| − | ! scope="col"|% |
||
|- |
|- |
||
| + | |colspan="2" align="center" style="background: #3A5766;"|<font color="white">'''Bugs''' </font> |
||
| − | |Huskberry |
||
| − | |52 |
||
| − | |Carpenterbug |
||
| − | |30 |
||
| − | |Hot Pepper |
||
| − | |65 |
||
| − | |Nothing |
||
| − | |58 |
||
| − | |Bitterbug |
||
| − | |35 |
||
|- |
|- |
||
| + | |[[File:MH4G-Bug Icon Blue.png|19px]] Bitterbug |
||
| − | |Huskberry |
||
| + | |Areas 1, 6, 7 and 8 |
||
| − | |33 |
||
| − | |Thunderbug |
||
| − | |28 |
||
| − | |Bomberry |
||
| − | |25 |
||
| − | |Sushifish |
||
| − | |11 |
||
| − | |Flashbug |
||
| − | |20 |
||
|- |
|- |
||
| + | |[[File:MH4G-Bug Icon Grey.png|19px]] Carpenterbug |
||
| − | |Power Seed |
||
| + | |Areas 1, 6, 7 and 8 |
||
| − | |15 |
||
| − | |Godbug |
||
| − | |17 |
||
| − | |Stone |
||
| − | |10 |
||
| − | |Rumblefish |
||
| − | |9 |
||
| − | |Carpenterbug |
||
| − | |20 |
||
|- |
|- |
||
| + | |[[File:MH4G-Bug Icon Green.png|19px]] Killer Beetle |
||
| − | | |
||
| + | |Areas 1, 6, 7 and 8 |
||
| − | | |
||
| − | |Insect Husk |
||
| − | |12 |
||
| − | | |
||
| − | | |
||
| − | |Burst Arrowana |
||
| − | |7 |
||
| − | |Insect Husk |
||
| − | |10 |
||
|- |
|- |
||
| + | |[[File:MH4G-Bug Icon Yellow.png|19px]] Flashbug |
||
| − | | |
||
| + | |Areas 1, 6, 7 and 8 |
||
| − | | |
||
| − | |Killer Beetle |
||
| − | |8 |
||
| − | | |
||
| − | | |
||
| − | |Goldenfish |
||
| − | |5 |
||
| − | |Royal Rhino |
||
| − | |10 |
||
|- |
|- |
||
| + | |[[File:MH4G-Bug Icon Purple.png|19px]] Royal Rhino |
||
| − | | |
||
| + | |Areas 1, 6, 7 and 8 |
||
| − | | |
||
| − | |Royal Rhino |
||
| − | |5 |
||
| − | | |
||
| − | | |
||
| − | |Glutton Tuna |
||
| − | |5 |
||
| − | |Cricket |
||
| − | |5 |
||
|- |
|- |
||
| + | |[[File:MH4G-Bug Icon Grey.png|19px]] Insect Husk |
||
| − | | |
||
| + | |Areas 1, 6, 7 and 8 |
||
| − | | |
||
| − | | |
||
| − | | |
||
| − | | |
||
| − | | |
||
| − | |Knife Mackerel |
||
| − | |5 |
||
| − | | |
||
| − | | |
||
| − | |} |
||
| − | |||
| − | ==Area 2== |
||
| − | Large, empty desert area. |
||
| − | |||
| − | During the day it is very hot, bring '''Cool Drinks'''. During the night it is very cold, bring '''Hot Drinks'''. |
||
| − | |||
| − | [[Hermitaur]]s and [[Cephalos]] are most common to this area. |
||
| − | |||
| − | '''Plants''' and '''berries''' grow in abundance here. |
||
| − | |||
| − | '''Village 1-6 *''' |
||
| − | |||
| − | '''Gathering Hall 1-5 *''' |
||
| − | {| border="1" cellpadding="1" cellspacing="1" style="width: 450px;" |
||
| − | ! scope="col"|Plants |
||
| − | ! scope="col"|% |
||
| − | ! scope="col"|Berrys |
||
| − | ! scope="col"|% |
||
| − | ! scope="col"|Plants |
||
| − | ! scope="col"|% |
||
| − | ! scope="col"|Plants |
||
| − | ! scope="col"|% |
||
|- |
|- |
||
| + | |[[File:MH4G-Bug Icon White.png|19px]] Godbug |
||
| − | |Fire Herb |
||
| + | |Areas 1, 6, 7 and 8 |
||
| − | |75 |
||
| − | |Bomberry |
||
| − | |56 |
||
| − | |Cactus Flower |
||
| − | |65 |
||
| − | |Cactus Flower |
||
| − | |65 |
||
|- |
|- |
||
| + | |[[File:MH4G-Bug Icon Yellow.png|19px]] Thunderbug |
||
| − | |Hot Pepper |
||
| + | |Areas 1, 6, 7 and 8 |
||
| − | |20 |
||
| − | |Huskberry |
||
| − | |33 |
||
| − | |Tropical Berry |
||
| − | |30 |
||
| − | |Tropical Berry |
||
| − | |30 |
||
|- |
|- |
||
| + | |colspan="2" align="center" style="background: #3A5766;"|<font color="white">'''Fish Bait''' </font> |
||
| − | |Insect Husk |
||
| − | |5 |
||
| − | |Power Seed |
||
| − | |11 |
||
| − | |Red Seed |
||
| − | |5 |
||
| − | |Red Seed |
||
| − | |5 |
||
| − | |} |
||
| − | |||
| − | ==Area 3== |
||
| − | Rocky area, cliffs shelter the hunter from otherwise harsh conditions. |
||
| − | |||
| − | [[Genprey]] and [[Vespoid]] often call this place home. |
||
| − | |||
| − | A '''mining point''' is accompanied by '''plants''' and '''berries'''. |
||
| − | |||
| − | '''Village 1-6 *''' |
||
| − | |||
| − | '''Gathering Hall 1-5 *''' |
||
| − | {| border="1" cellpadding="1" cellspacing="1" style="width: 450px;" |
||
| − | ! scope="col"|Plants |
||
| − | ! scope="col"|% |
||
| − | ! scope="col"|Berrys |
||
| − | ! scope="col"|% |
||
| − | ! scope="col"|Misc |
||
| − | ! scope="col"|% |
||
| − | ! scope="col"|Mining |
||
| − | ! scope="col"|% |
||
|- |
|- |
||
| + | |[[File:MH4G-Bait Icon Green.png|19px]] Cricket |
||
| − | |Herb |
||
| + | |Areas 1, 6, 7 and 8 |
||
| − | |60 |
||
| − | |Bomberry |
||
| − | |56 |
||
| − | |Worm |
||
| − | |60 |
||
| − | |Iron Ore |
||
| − | |35 |
||
|- |
|- |
||
| + | |colspan="2" align="center" style="background: #3A5766;"|<font color="white">'''Fish''' </font> |
||
| − | |Sap Plant |
||
| − | |30 |
||
| − | |Huskberry |
||
| − | |33 |
||
| − | |Frog |
||
| − | |35 |
||
| − | |Earth Crystal |
||
| − | |20 |
||
|- |
|- |
||
| + | |[[File:MH4G-Fish Icon Orange.png|19px]] Sushifish |
||
| − | |Green Seed |
||
| + | |Areas 1, 6 and 7 |
||
| − | |10 |
||
| − | |Power Seed |
||
| − | |11 |
||
| − | |Nothing |
||
| − | |5 |
||
| − | |Goldstone Piece |
||
| − | |20 |
||
|- |
|- |
||
| + | |[[File:MH4G-Fish Icon Grey.png|19px]] Rumblefish |
||
| − | | |
||
| + | |Areas 1, 6 and 7 |
||
| − | | |
||
| − | | |
||
| − | | |
||
| − | | |
||
| − | | |
||
| − | |Whetstone |
||
| − | |15 |
||
|- |
|- |
||
| + | |[[File:MH4G-Fish Icon Green.png|19px]] Burst Arrowana |
||
| − | | |
||
| + | |Areas 1, 6 and 7 |
||
| − | | |
||
| − | | |
||
| − | | |
||
| − | | |
||
| − | | |
||
| − | |Stone |
||
| − | |10 |
||
| − | |} |
||
| − | |||
| − | ==Area 4== |
||
| − | Almost completely enclosed cavern, the rocks overhead shelter the hunter from the desert climate. |
||
| − | |||
| − | [[Genprey]] love it here and are common to the area. |
||
| − | |||
| − | Three '''mining points''' can be exploited here. |
||
| − | |||
| − | Dung, Wyvern Dropping, and Kut-Ku Scales can be found here. |
||
| − | |||
| − | '''Village 1-6 *''' |
||
| − | |||
| − | '''Gathering Hall 1-5 *''' |
||
| − | {| border="1" cellpadding="1" cellspacing="1" style="width: 500px;" |
||
| − | ! scope="col"|Mining |
||
| − | ! scope="col"|% |
||
| − | ! scope="col"|Misc |
||
| − | ! scope="col"|% |
||
| − | ! scope="col"|Mining |
||
| − | ! scope="col"|% |
||
| − | ! scope="col"|Mining |
||
| − | ! scope="col"|% |
||
|- |
|- |
||
| + | |[[File:MH4G-Fish Icon Yellow.png|19px]] Goldenfish |
||
| − | |Iron Ore |
||
| + | |Areas 1, 6 and 7 |
||
| − | |35 |
||
| − | |Dung |
||
| − | |69 |
||
| − | |Iron Ore |
||
| − | |30 |
||
| − | |Earth Crystal |
||
| − | |30 |
||
|- |
|- |
||
| + | |[[File:MH4G-Fish Icon Grey.png|19px]] Glutton Tuna |
||
| − | |Earth Crystal |
||
| + | |Areas 1, 6 and 7 |
||
| − | |20 |
||
| − | |Scatternut |
||
| − | |11 |
||
| − | |Disk Stone |
||
| − | |25 |
||
| − | |Disk Stone |
||
| − | |30 |
||
|- |
|- |
||
| + | |[[File:MH4G-Fish Icon Yellow.png|19px]] Knife Mackerel |
||
| − | |Goldstone Piece |
||
| + | |Areas 1, 6 and 7 |
||
| − | |20 |
||
| − | |Wyvern Droppings |
||
| − | |10 |
||
| − | |Suiko Jewel |
||
| − | |20 |
||
| − | |Whetstone |
||
| − | |15 |
||
|- |
|- |
||
| + | |colspan="2" align="center" style="background: #3A5766;"|<font color="white">'''Berries''' </font> |
||
| − | |Whetstone |
||
| − | |15 |
||
| − | |Kut-Ku Scale |
||
| − | |10 |
||
| − | |Goldstone Piece |
||
| − | |15 |
||
| − | |Machalite Ore |
||
| − | |15 |
||
|- |
|- |
||
| + | |[[File:MH4G-Husk Icon Grey.png|19px]] Huskberry |
||
| − | |Stone |
||
| + | |Areas 1, 2, 3 and 6 |
||
| − | |10 |
||
| − | | |
||
| − | | |
||
| − | |Stone |
||
| − | |10 |
||
| − | |Goldstone Piece |
||
| − | |10 |
||
| − | |} |
||
| − | |||
| − | ==Area 5== |
||
| − | Large, empty desert area. |
||
| − | |||
| − | During the day it is very hot, bring '''Cool Drinks'''. During the night it is very cold, bring '''Hot Drinks'''. |
||
| − | |||
| − | [[Hermitaur]]s and [[Cephalos]] are most common to this area. [[Genprey]] can often be seen here too. |
||
| − | |||
| − | Only '''Plants''' can be collected here. |
||
| − | |||
| − | '''Village 1-6 *''' |
||
| − | |||
| − | '''Gathering Hall 1-5 *''' |
||
| − | {| border="1" cellpadding="1" cellspacing="1" style="width: 450px;" |
||
| − | ! scope="col"|Plants |
||
| − | ! scope="col"|% |
||
| − | ! scope="col"|Plants |
||
| − | ! scope="col"|% |
||
| − | ! scope="col"|Plants |
||
| − | ! scope="col"|% |
||
| − | ! scope="col"|Plants |
||
| − | ! scope="col"|% |
||
|- |
|- |
||
| + | |[[File:MH4G-Seed Icon Red.png|19px]] Power Seed |
||
| − | |Fire Herb |
||
| + | |Areas 1, 2, 3 and 6 |
||
| − | |75 |
||
| − | |Cactus Flower |
||
| − | |65 |
||
| − | |Herb |
||
| − | |55 |
||
| − | |Cactus Flower |
||
| − | |65 |
||
|- |
|- |
||
| + | |[[File:MH4G-Seed Icon Grey.png|19px]] Bomberry |
||
| − | |Hot Pepper |
||
| + | |Areas 1, 2, 3 and 6 |
||
| − | |20 |
||
| − | |Tropical Berry |
||
| − | |30 |
||
| − | |Fire Herb |
||
| − | |40 |
||
| − | |Tropical Berry |
||
| − | |30 |
||
|- |
|- |
||
| + | |[[File:MH4G-Seed Icon Green.png|19px]] Green Seed |
||
| − | |Insect Husk |
||
| + | |Areas 1, 2, 3 and 6 |
||
| − | |5 |
||
| − | |Red Seed |
||
| − | |5 |
||
| − | |Green Seed |
||
| − | |5 |
||
| − | |Red Seed |
||
| − | |5 |
||
| − | |} |
||
| − | |||
| − | ==Area 6== |
||
| − | A large, underground cavern, the river in Area 7 runs into the lake here. |
||
| − | |||
| − | In daytime, you can travel to Area 4. But in nighttime, high tide occurs and blocks the route to Area 4. |
||
| − | |||
| − | This area can alternately be reached by climbing into the well near the Red Delivery box in the base camp. |
||
| − | |||
| − | This underground cavern is very cold; '''Hot Drinks''' are always required. |
||
| − | |||
| − | [[Hermitaur]]s and [[Genprey]] are most common here, although [[Great Thunderbug]]s are also regular visitors. |
||
| − | |||
| − | A little of everything is offered here; '''Berries''' and '''Plants''' can be harvested, '''Fish''' and '''Bugs''' can be caught and there is a single '''Mining Point'''. |
||
| − | |||
| − | '''Village 1-6 *''' |
||
| − | |||
| − | '''Gathering Hall 1-5 *''' |
||
| − | {| border="1" cellpadding="1" cellspacing="1" style="width: 600px;" |
||
| − | ! scope="col"|Mining |
||
| − | ! scope="col"|% |
||
| − | ! scope="col"|Berrys |
||
| − | ! scope="col"|% |
||
| − | ! scope="col"|Plants |
||
| − | ! scope="col"|% |
||
| − | ! scope="col"|Fishing |
||
| − | ! scope="col"|% |
||
| − | ! scope="col"|Bugs |
||
| − | ! scope="col"|% |
||
|- |
|- |
||
| + | |[[File:MH4G-Seed Icon Grey.png|19px]] Needleberry |
||
| − | |Iron Ore |
||
| + | |Areas 1, 2, 3 and 6 |
||
| − | |35 |
||
| − | |Needleberry |
||
| − | |60 |
||
| − | |Power Seed |
||
| − | |50 |
||
| − | |Pin Tuna |
||
| − | |32 |
||
| − | |Carpenterbug |
||
| − | |30 |
||
|- |
|- |
||
| + | |[[File:MH4G-Seed Icon Orange.png|19px]] Tropical Berry |
||
| − | |Earth Crystal |
||
| + | |Areas 1, 2, 3 and 6 |
||
| − | |20 |
||
| − | |Felvine |
||
| − | |35 |
||
| − | |Stone |
||
| − | |30 |
||
| − | |Rumblefish |
||
| − | |30 |
||
| − | |Thunderbug |
||
| − | |28 |
||
|- |
|- |
||
| + | |[[File:MH4G-Seed Icon Red.png|19px]] Red Seed |
||
| − | |Goldstone Piece |
||
| + | |Areas 1, 2, 3 and 6 |
||
| − | |20 |
||
| − | |Insect Husk |
||
| − | |5 |
||
| − | |Dragon Toadstool |
||
| − | |20 |
||
| − | |Burst Arrowana |
||
| − | |30 |
||
| − | |Godbug |
||
| − | |17 |
||
|- |
|- |
||
| + | |[[File:MH4G-Seed Icon Pink.png|19px]] Paintberry |
||
| − | |Stone |
||
| + | |Areas 1, 2, 3 and 6 |
||
| − | |15 |
||
| − | | |
||
| − | | |
||
| − | | |
||
| − | | |
||
| − | |Goldenfish |
||
| − | |8 |
||
| − | |Insect Husk |
||
| − | |12 |
||
|- |
|- |
||
| + | |colspan="2" align="center" style="background: #3A5766;"|<font color="white">'''Mushroom''' </font> |
||
| − | |Ice Crystal |
||
| − | |10 |
||
| − | | |
||
| − | | |
||
| − | | |
||
| − | | |
||
| − | | |
||
| − | | |
||
| − | |Killer Beetle |
||
| − | |8 |
||
|- |
|- |
||
| + | |[[File:MH4G-Mushroom Icon Red.png|19px]] Dragon Toadstool |
||
| − | |Ruststone |
||
| + | |Area 6 |
||
| − | | |
||
| − | Very rare less than 1% |
||
| − | | |
||
| − | | |
||
| − | | |
||
| − | | |
||
| − | | |
||
| − | | |
||
| − | |Royal Rhino |
||
| − | |5 |
||
| − | |} |
||
| − | |||
| − | ==Area 7== |
||
| − | A mild climated area surrounded by cliffs and overlooking a river. |
||
| − | |||
| − | Some Wyverns and large monsters like to '''sleep''' here when they are hurt. |
||
| − | |||
| − | [[Apceros]] and [[Cephalos]] like it here. |
||
| − | |||
| − | '''Plants''' can be harvested and '''Bugs''' and '''Fish''' can be caught here. |
||
| − | |||
| − | '''Village 1-6 *''' |
||
| − | |||
| − | '''Gathering Hall 1-5 *''' |
||
| − | {| border="1" cellpadding="1" cellspacing="1" style="width: 550px;" |
||
| − | ! scope="col"|Plants |
||
| − | ! scope="col"|% |
||
| − | ! scope="col"|Bugs |
||
| − | ! scope="col"|% |
||
| − | ! scope="col"|Plants |
||
| − | ! scope="col"|% |
||
| − | ! scope="col"|Fishing |
||
| − | ! scope="col"|% |
||
| − | ! scope="col"|Plants |
||
| − | ! scope="col"|% |
||
|- |
|- |
||
| + | |colspan="2" align="center" style="background: #3A5766;"|<font color="white">'''Ore''' </font> |
||
| − | |Hot Pepper |
||
| − | |65 |
||
| − | |Bitterbug |
||
| − | |35 |
||
| − | |Herb |
||
| − | |60 |
||
| − | |Glutton Tuna |
||
| − | |30 |
||
| − | |Sunset Herb |
||
| − | |80 |
||
|- |
|- |
||
| + | |[[File:MH4G-Ore Icon Grey.png|19px]] Iron Ore |
||
| − | |Bomberry |
||
| + | |Areas 3, 4, 6 and 10 |
||
| − | |25 |
||
| − | |Flashbug |
||
| − | |18 |
||
| − | |Sap Plant |
||
| − | |30 |
||
| − | |Burst Arrowana |
||
| − | |20 |
||
| − | |Sap Plant |
||
| − | |15 |
||
|- |
|- |
||
| + | |[[File:MH4G-Ore Icon White.png|19px]] Earth Crystal |
||
| − | |Stone |
||
| + | |Areas 3, 4, 6 and 10 |
||
| − | |10 |
||
| − | |Godbug |
||
| − | |15 |
||
| − | |Green Seed |
||
| − | |10 |
||
| − | |Nothing |
||
| − | |20 |
||
| − | |Nothing |
||
| − | |5 |
||
|- |
|- |
||
| + | |[[File:MH4G-Ore Icon Grey.png|19px]] Disk Stone |
||
| − | | |
||
| + | |Areas 3, 4, 6 and 10 |
||
| − | | |
||
| − | |Royal Rhino |
||
| − | |15 |
||
| − | | |
||
| − | | |
||
| − | |Sleepyfish |
||
| − | |15 |
||
| − | | |
||
| − | | |
||
|- |
|- |
||
| + | |[[File:MH4G-Ore Icon Purple.png|19px]] Machalite Ore |
||
| − | | |
||
| + | |Areas 3, 4, 6 and 10 |
||
| − | | |
||
| − | |Firefly |
||
| − | |10 |
||
| − | | |
||
| − | | |
||
| − | |Sushifish |
||
| − | |10 |
||
| − | | |
||
| − | | |
||
|- |
|- |
||
| + | |[[File:MH4G-Ore Icon Grey.png|19px]] Stone |
||
| − | | |
||
| + | |Areas 3, 4, 6 and 10 |
||
| − | | |
||
| − | |Insect Husk |
||
| − | |7 |
||
| − | | |
||
| − | | |
||
| − | |Small Goldenfish |
||
| − | |5 |
||
| − | | |
||
| − | | |
||
| − | |} |
||
| − | |||
| − | ==Area 8== |
||
| − | Veggie Elder here can give you for free: Shock Trap, Brute Bone, Huskberry, Sm Bone Husk. |
||
| − | A small desert community of [[Felyne]] and [[Melynx]] live here. |
||
| − | |||
| − | There is a '''Pickup Point '''where you can get '''Old Pickaxes'''. |
||
| − | |||
| − | '''Bugs''' can be caught here and there is a '''Drop Point''' for stolen goods. |
||
| − | |||
| − | '''Village 1-6 *''' |
||
| − | |||
| − | '''Gathering Hall 1-5 *''' |
||
| − | {| border="1" cellpadding="1" cellspacing="1" style="width: 450px;" |
||
| − | ! scope="col"|Misc |
||
| − | ! scope="col"|% |
||
| − | ! scope="col"|Bugs |
||
| − | ! scope="col"|% |
||
| − | ! scope="col"|Misc |
||
| − | ! scope="col"|% |
||
| − | ! scope="col"|Plants |
||
| − | ! scope="col"|% |
||
|- |
|- |
||
| + | |[[File:MH4G-Ore Icon Light Blue.png|19px]] Ice Crystal |
||
| − | |Small Barrel |
||
| + | |Areas 3, 4, 6 and 10 |
||
| − | |55 |
||
| − | |Bitterbug |
||
| − | |35 |
||
| − | |Old Pickaxe |
||
| − | |40 |
||
| − | |Cactus Flower |
||
| − | |65 |
||
|- |
|- |
||
| + | |[[File:MH4G-Question Mark Icon Grey.png|19px]] Ruststone |
||
| − | |Large Barrel |
||
| + | |Areas 3, 4, 6 and 10 |
||
| − | |40 |
||
| − | |Carpenterbug |
||
| − | |20 |
||
| − | |Huskberry |
||
| − | |25 |
||
| − | |Tropical Berry |
||
| − | |30 |
||
|- |
|- |
||
| + | |[[File:MH4G-Jewel Icon Blue.png|19px]] Suiko Jewel |
||
| − | |Dung Bomb |
||
| + | |Areas 3, 4, 6 and 10 |
||
| − | |5 |
||
| − | |Flashbug |
||
| − | |20 |
||
| − | |Gunpowder |
||
| − | |15 |
||
| − | |Red Seed |
||
| − | |5 |
||
|- |
|- |
||
| + | |[[File:MH4G-Ore Icon Yellow.png|19px]] Goldstone Piece |
||
| − | | |
||
| + | |Areas 3, 4, 6 and 10 |
||
| − | | |
||
| − | |Royal Rhino |
||
| − | |10 |
||
| − | |Throwing Knife |
||
| − | |10 |
||
| − | | |
||
| − | | |
||
|- |
|- |
||
| + | |[[File:MH4G-Whetstone Icon Yellow.png|19px]] Whetstone |
||
| − | | |
||
| + | |Areas 3, 4, 6 and 10 |
||
| − | | |
||
| − | |Insect Husk |
||
| − | |10 |
||
| − | |Unknown Skull |
||
| − | |5 |
||
| − | | |
||
| − | | |
||
|- |
|- |
||
| + | |colspan="2" align="center" style="background: #3A5766;"|<font color="white">'''Plants''' </font> |
||
| − | | |
||
| − | | |
||
| − | |Cricket |
||
| − | |5 |
||
| − | |Barrel Lid |
||
| − | |5 |
||
| − | | |
||
| − | | |
||
| − | |} |
||
| − | |||
| − | ==Area 9== |
||
| − | A mild region bordering the desert. |
||
| − | |||
| − | Some Wyverns and large monsters like to '''sleep''' here when they are hurt. |
||
| − | |||
| − | [[Apceros]] and [[Vespoid]] are common to the area. Melynx are regular visitors in the area. |
||
| − | |||
| − | Lots of '''plants''' can be harvested here. |
||
| − | |||
| − | '''Village 1-6 *''' |
||
| − | |||
| − | '''Gathering Hall 1-5 *''' |
||
| − | {| border="1" cellpadding="1" cellspacing="1" style="width: 400px;" |
||
| − | ! scope="col"|Plants |
||
| − | ! scope="col"|% |
||
| − | ! scope="col"|Plants |
||
| − | ! scope="col"|% |
||
| − | ! scope="col"|Plants |
||
| − | ! scope="col"|% |
||
| − | ! scope="col"|Plants |
||
| − | ! scope="col"|% |
||
|- |
|- |
||
| + | |[[File:MH4G-Herb Icon Green.png|19px]] Herb |
||
| − | |Needleberry |
||
| + | |Areas 1, 2, 3, 5, 6, 7 and 9 |
||
| − | |46 |
||
| − | |Hot Pepper |
||
| − | |65 |
||
| − | |Cactus Flower |
||
| − | |65 |
||
| − | |Sunset Herb |
||
| − | |60 |
||
|- |
|- |
||
| + | |[[File:MH4G-Herb Icon Red.png|19px]] Hot Pepper |
||
| − | |Huskberry |
||
| + | |Areas 1, 2, 3, 5, 6, 7 and 9 |
||
| − | |44 |
||
| − | |Bomberry |
||
| − | |25 |
||
| − | |Tropical Berry |
||
| − | |30 |
||
| − | |Paintberry |
||
| − | |30 |
||
|- |
|- |
||
| + | |[[File:MH4G-Herb Icon Pink.png|19px]] Cactus Flower |
||
| − | |Bomberry |
||
| + | |Areas 1, 2, 3, 5, 6, 7 and 9 |
||
| − | |10 |
||
| + | |- |
||
| − | |Stone |
||
| + | |[[File:MH4G-Herb Icon Red.png|19px]] Fire Herb |
||
| − | |10 |
||
| + | |Areas 1, 2, 3, 5, 6, 7 and 9 |
||
| − | |Red Seed |
||
| − | | |
+ | |- |
| + | |[[File:MH4G-Herb Icon White.png|19px]] Sap Plant |
||
| − | |Insect Husk |
||
| + | |Areas 1, 2, 3, 5, 6, 7 and 9 |
||
| − | |10 |
||
| + | |- |
||
| + | |[[File:MH4G-Herb Icon Yellow.png|19px]] Felvine |
||
| + | |Areas 1, 2, 3, 5, 6, 7 and 9 |
||
| + | |- |
||
| + | |[[File:MH4G-Herb Icon Purple.png|19px]] Sunset Herb |
||
| + | |Areas 1, 2, 3, 5, 6, 7 and 9 |
||
|} |
|} |
||
| + | {{-}} |
||
| − | |||
| − | == |
+ | ==Geography== |
| + | {| |
||
| − | Almost completely enclosed cavern, the rocks overhead shelter the hunter from the desert climate. |
||
| − | |||
| − | [[Hermitaur]]s call this place home. |
||
| − | |||
| − | A single '''mining point''' can be exploited here. |
||
| − | |||
| − | Dung, Wyvern Droppings, Herbivore Eggs and Kut Ku Scales can be found here. |
||
| − | |||
| − | '''Village 1-6 *''' |
||
| − | |||
| − | '''Gathering Hall 1-5 *''' |
||
| − | {| border="1" cellpadding="1" cellspacing="1" style="width: 500px;" |
||
| − | ! scope="col"|Misc |
||
| − | ! scope="col"|% |
||
| − | ! scope="col"|Mining |
||
| − | ! scope="col"|% |
||
| − | ! scope="col"|Misc |
||
| − | ! scope="col"|% |
||
| − | ! scope="col"|Misc |
||
| − | ! scope="col"|% |
||
|- |
|- |
||
| + | |colspan="2"|'''Base Camp''' |
||
| − | |Dung |
||
| − | |69 |
||
| − | |Earth Crystal |
||
| − | |30 |
||
| − | |Mystery Bone |
||
| − | |60 |
||
| − | |Sm Bone Husk |
||
| − | |60 |
||
|- |
|- |
||
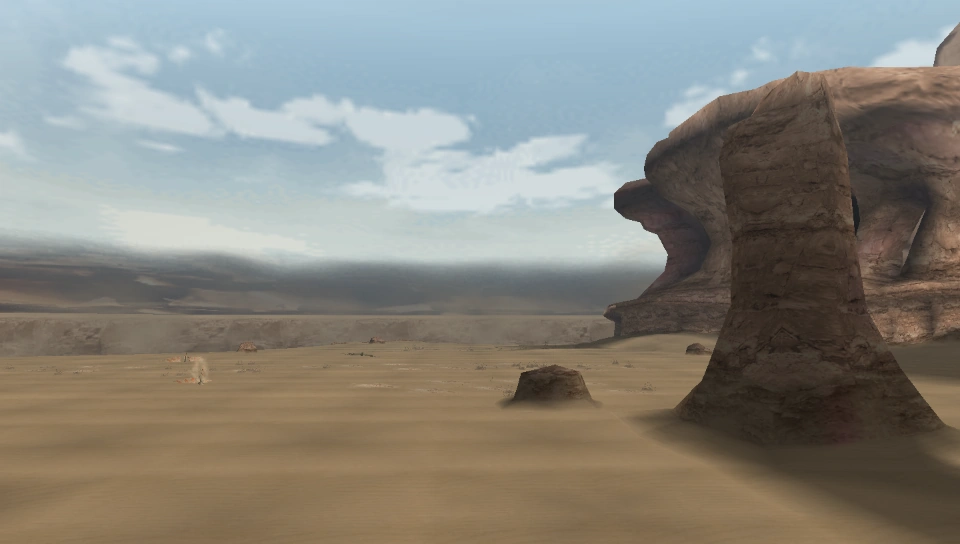
| + | |[[File:MHFU-Desert Screenshot 001.png|thumb|center]] |
||
| − | |Scatternut |
||
| + | |A small section between low cliffs, a view of the vast desert on a border path leads further into the Desert, while the dried well can be used to reach Area 6. |
||
| − | |11 |
||
| − | |Disk Stone |
||
| − | |25 |
||
| − | |Herbivore Egg |
||
| − | |30 |
||
| − | |Bone |
||
| − | |30 |
||
|- |
|- |
||
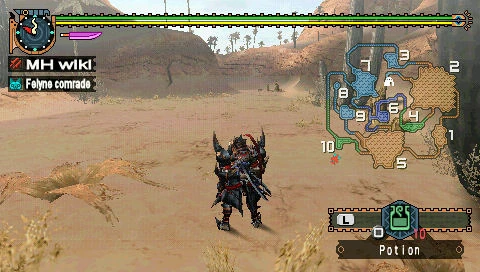
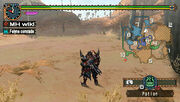
| + | |colspan="2"|'''Area 1''' |
||
| − | |Kut-Ku Scale |
||
| − | | |
+ | |- |
| + | |rowspan="2"|[[File:MHFU-Desert Screenshot 002.png|thumb|center]] |
||
| − | |Whetstone |
||
| + | |A narrow oasis where herbivores roam, on the other side is a massive ominous cliff. |
||
| − | |20 |
||
| + | |- |
||
| − | |Unknown Skull |
||
| + | |Monsters: [[Apceros]], [[Cephalos]], [[Ceanataur]], [[Genprey]]. |
||
| − | |10 |
||
| + | |- |
||
| − | |Unknown Skull |
||
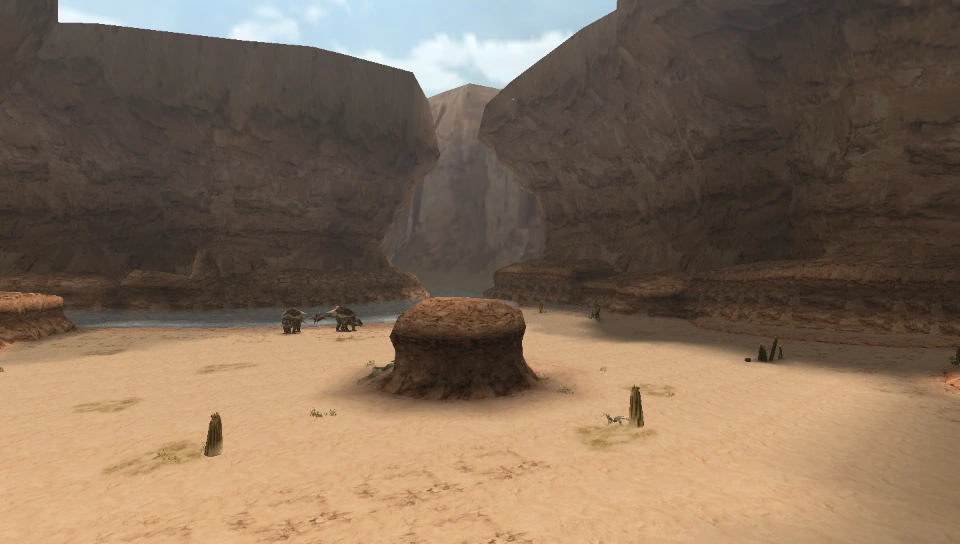
| + | |colspan="2"|'''Area 2''' |
||
| − | |10 |
||
| + | |- |
||
| + | |rowspan="2"|[[File:MHFU-Desert Screenshot 003.png|thumb|center]] |
||
| + | |A wide open desert, the south and west sections are bordered by cliffs and canyons, while the north and east lead to a distant canyon and the open desert respectively. |
||
| + | |- |
||
| + | |Monsters: [[Cephalos]], [[Great Thunderbug]]. |
||
| + | |- |
||
| + | |colspan="2"|'''Area 3''' |
||
| + | |- |
||
| + | |rowspan="2"|[[File:MHFU-Desert Screenshot 004.png|thumb|center]] |
||
| + | |A small section in the canyons, there is a ledge which can be used to trick [[Diablos]], [[Monoblos]] and [[Tigrex]]. |
||
| + | |- |
||
| + | |Monsters: [[Bullfango]], [[Vespoid]], [[Great Thunderbug]], [[Genprey]]. |
||
| + | |- |
||
| + | |colspan="2"|'''Area 4''' |
||
| + | |- |
||
| + | |rowspan="2"|[[File:MHFU-Desert Screenshot 005.png|thumb|center]] |
||
| + | |A narrow cave-like path between ominous cliffs that close in on the ceiling. |
||
| + | |- |
||
| + | |Monsters: [[Genprey]], [[Apceros]], [[Great Thunderbug]], [[Melynx]]. |
||
| + | |- |
||
| + | |colspan="2"|'''Area 5''' |
||
| + | |- |
||
| + | |rowspan="2"|[[File:MHFU-Desert Screenshot 006.png|thumb|center]] |
||
| + | |Another wide open desert with a few rocks on the northern side and a massive drop off to the black depths on the south. |
||
| + | |- |
||
| + | |Monsters: [[Cephalos]], [[Genprey]], [[Great Thunderbug]]. |
||
| + | |- |
||
| + | |colspan="2"|'''Area 6''' |
||
| + | |- |
||
| + | |rowspan="2"|[[File:MHFU-Desert Screenshot 007.png|thumb|center]] |
||
| + | |A large cave filled with water, during the night the water level goes up, dividing this area into two separate sections. |
||
| + | |- |
||
| + | |Monsters: [[Apceros]], [[Genprey]], [[Hermitaur]], [[Vespoid]], [[Great Thunderbug]], [[Melynx]]. |
||
| + | |- |
||
| + | |colspan="2"|'''Area 7''' |
||
| + | |- |
||
| + | |rowspan="2"|[[File:MHFU-Desert Screenshot 008.png|thumb|center]] |
||
| + | |A wide open section in the canyons with a body of water, there is a rock formation in the middle which can be used to trick wyverns. |
||
| + | |- |
||
| + | |Monsters: [[Apceros]], [[Genprey]], [[Cephalos]], [[Great Thunderbug]]. |
||
| + | |- |
||
| + | |colspan="2"|'''Area 8''' |
||
| + | |- |
||
| + | |rowspan="2"|[[File:MHFU-Desert Screenshot 009.png|thumb|center]] |
||
| + | |A Felyne village, the mud houses line the perimeter and the Veggie Elder wanders around here. |
||
|- |
|- |
||
| − | |Wyvern Droppings |
||
| − | |10 |
||
| − | |Machalite Ore |
||
| − | |15 |
||
| − | | |
||
| − | | |
||
| − | | |
||
| |
| |
||
|- |
|- |
||
| + | |colspan="2"|'''Area 9''' |
||
| − | | |
||
| − | | |
+ | |- |
| + | |rowspan="2"|[[File:MHFU-Desert Screenshot 010.png|thumb|center]] |
||
| − | |Goldstone Piece |
||
| + | |An open section between small cliffs, monsters come here to rest. |
||
| − | |10 |
||
| − | | |
+ | |- |
| + | |Monsters: [[Vespoid]], [[Genprey]], [[Great Thunderbug]]. |
||
| − | | |
||
| − | | |
+ | |- |
| + | |colspan="2"|'''Area 10''' |
||
| − | | |
||
| + | |- |
||
| + | |rowspan="2"|[[File:MHFU-Desert Screenshot 011.png|thumb|center]] |
||
| + | |Another cave-like area where Herbivores have set their nest. |
||
| + | |- |
||
| + | |Monsters: [[Apceros]], [[Melynx]], [[Genprey]]. |
||
| + | |- |
||
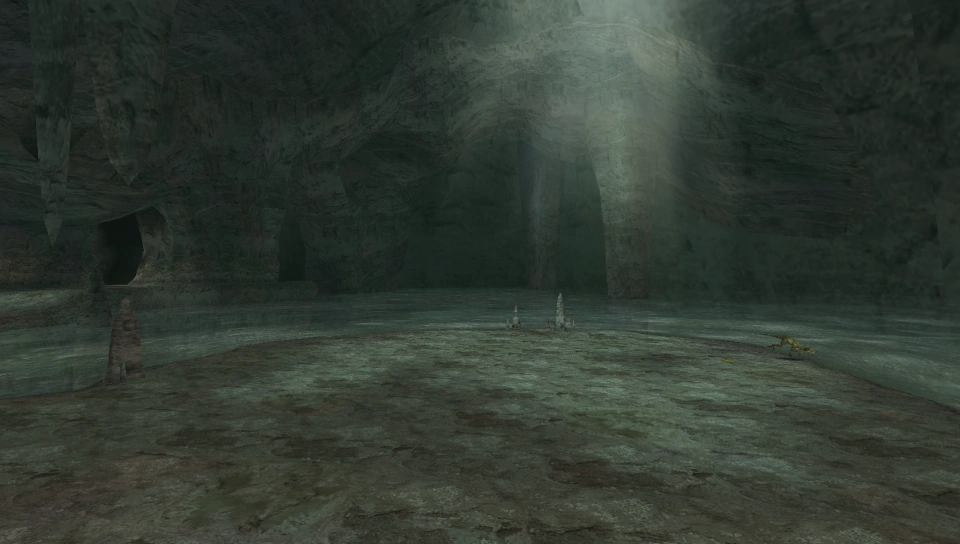
| + | |colspan="2"|'''Secret Area''' |
||
| + | |- |
||
| + | |rowspan="2"|[[File:Game-Pic2.jpg|thumb|center]] |
||
| + | |An enclosed rocky area, inhabited by [[Felyne]]s. It is connected to Area 5. As with all [[Secret Areas]], it is possible to spawn here at the beginning of a quest in High-rank. A single Mining Point, a bug-gathering point, and two Plants can be exploited here. Umbrellas, Masters Skulls and Felyne Fur Rubies can be picked up among the Plants. |
||
| + | |- |
||
| + | |Monsters: [[Felyne]], [[Melynx]]. |
||
|} |
|} |
||
| + | ==Gallery== |
||
| + | ===Monster Hunter Freedom Unite=== |
||
| − | ==Secret Area== |
||
| + | <gallery> |
||
| + | MHFU-Desert Screenshot 001.png |
||
| + | MHFU-Desert Screenshot 002.png |
||
| + | MHFU-Desert Screenshot 003.png |
||
| + | MHFU-Desert Screenshot 004.png |
||
| + | MHFU-Desert Screenshot 005.png |
||
| + | MHFU-Desert Screenshot 006.png |
||
| + | MHFU-Desert Screenshot 007.png |
||
| + | MHFU-Desert Screenshot 008.png |
||
| + | MHFU-Desert Screenshot 009.png |
||
| + | MHFU-Desert Screenshot 010.png |
||
| + | MHFU-Desert Screenshot 011.png |
||
| + | </gallery> |
||
| + | ===Monster Hunter Generations Ultimate=== |
||
| − | [[File:Game-Pic2.jpg]] |
||
| + | <gallery> |
||
| + | MHXX-Desert Artwork 001.jpg |
||
| + | MHXX-Desert Artwork 002.jpg |
||
| + | MHXX-Desert Screenshot 001.jpg |
||
| + | </gallery> |
||
| + | ==Music Themes== |
||
| − | |||
| + | {|class="wikitable" align="center" style="text-align:center; background-color:#EBEBEB; font-size:9pt;" |
||
| − | An enclosed rocky area. |
||
| + | !style="background-color:#3A5766; color:#ffffff;" | |
||
| − | |||
| + | !style="background-color:#3A5766; color:#ffffff;" |Title |
||
| − | [[Felyne]]s roam around here. |
||
| + | |- |
||
| − | |||
| + | |[[File:Monster Hunter Freedom Unite OST 08 - Raging Sandstorm (Desert Battle) HQ|70px]] |
||
| − | It's connected to Area 5. As with all [[Secret Areas]], it's possible to spawn here at the beginning of a mission in High Rank. |
||
| + | |'''MHFU/MHF-G8: Desert Music Theme (HR1-4)''' |
||
| − | |||
| + | |- |
||
| − | A single '''Mining Point''' and 2 '''Plants''' can be exploited here. |
||
| + | |[[File:『灼熱の絶望-砂漠(HR100~)』 - MHF 2012プレミアムpkgOST|70px]] |
||
| − | |||
| + | |'''MHF-G8: Desert Music Theme (HR5~)''' |
||
| − | There is an area to catch Bugs in as well. Both '''Royal''' and '''Divine Rhinos''' can be found here, the latter selling for 1000 Pokke Points. |
||
| + | |- |
||
| − | |||
| + | |[[File:『蜃気楼の向こう側 砂漠(G級の狩猟曲)』 - MHFG OST|70px]] |
||
| − | '''Umbrellas''', '''Masters Skulls''' and '''Felyne Fur Rubys''' can be picked up amongst the 2 '''Plants''' sometimes. |
||
| + | |'''MHF-G8: Desert Music Theme (G-rank)''' |
||
| + | |} |
||
==Videos== |
==Videos== |
||
| + | {{Video Gallery Box |
||
| − | {|cellpadding=5 cellspacing=0 border=0 |
||
| − | |[[File: |
+ | |Watch Equals = [[File:Monster Hunter Freedom Unite -- "White Night Dune" (Desert - Day)]] |
| + | |Title = White Night Dune |
||
| − | | |
||
| + | |Youtube User = octaneblue2 |
||
| − | |[[File:Monster_Hunter_Freedom_Unite_--_"White_Night_Dune"_(Desert_-_Night)|300px]]<br /><small>'''''The White Night Dune'' MHF2 Desert Night'''</small> |
||
| − | + | }} |
|
| + | {{Video Gallery Box |
||
| − | <br /> |
||
| + | |Watch Equals = [[File:Monster Hunter Freedom Unite -- "White Night Dune" (Desert - Night)]] |
||
| + | |Title = White Night Dune |
||
| + | |Youtube User = octaneblue2 |
||
| + | }} |
||
| − | =See Also= |
+ | ==See Also== |
| − | |||
| − | *[[Old Desert]] |
||
| − | *[[Area List]] |
||
*[[Info Magazine: About the Desert|About the Desert]] |
*[[Info Magazine: About the Desert|About the Desert]] |
||
{{-}} |
{{-}} |
||
| + | |||
{{Navbox-Locations}} |
{{Navbox-Locations}} |
||
[[Category:Areas]] |
[[Category:Areas]] |
||
Revision as of 19:21, 30 September 2018

Desert Map (MHXX)

Desert Day Map (MH2)

Desert Night Map (MH2)
Desert Resource Map
The Desert is a location introduced in Monster Hunter 2. It is characterized by vast, sandy expanses, subterranean caves, and rocky, canyon-like areas. The Desert is inhabited by many uniquely adapted monsters, such as Daimyo Hermitaur, Diablos, and Cephadrome. It returned in Monster Hunter Generations Ultimate.
Common Resources
| Resources | Areas found in |
|---|---|
| Bugs | |
| Areas 1, 6, 7 and 8 | |
| Areas 1, 6, 7 and 8 | |
| Areas 1, 6, 7 and 8 | |
| Areas 1, 6, 7 and 8 | |
| Areas 1, 6, 7 and 8 | |
| Areas 1, 6, 7 and 8 | |
| Areas 1, 6, 7 and 8 | |
| Areas 1, 6, 7 and 8 | |
| Fish Bait | |
| Areas 1, 6, 7 and 8 | |
| Fish | |
| Areas 1, 6 and 7 | |
| Areas 1, 6 and 7 | |
| Areas 1, 6 and 7 | |
| Areas 1, 6 and 7 | |
| Areas 1, 6 and 7 | |
| Areas 1, 6 and 7 | |
| Berries | |
| Areas 1, 2, 3 and 6 | |
| Areas 1, 2, 3 and 6 | |
| Areas 1, 2, 3 and 6 | |
| Areas 1, 2, 3 and 6 | |
| Areas 1, 2, 3 and 6 | |
| Areas 1, 2, 3 and 6 | |
| Areas 1, 2, 3 and 6 | |
| Areas 1, 2, 3 and 6 | |
| Mushroom | |
| Area 6 | |
| Ore | |
| Areas 3, 4, 6 and 10 | |
| Areas 3, 4, 6 and 10 | |
| Areas 3, 4, 6 and 10 | |
| Areas 3, 4, 6 and 10 | |
| Areas 3, 4, 6 and 10 | |
| Areas 3, 4, 6 and 10 | |
| Areas 3, 4, 6 and 10 | |
| Areas 3, 4, 6 and 10 | |
| Areas 3, 4, 6 and 10 | |
| Areas 3, 4, 6 and 10 | |
| Plants | |
| Areas 1, 2, 3, 5, 6, 7 and 9 | |
| Areas 1, 2, 3, 5, 6, 7 and 9 | |
| Areas 1, 2, 3, 5, 6, 7 and 9 | |
| Areas 1, 2, 3, 5, 6, 7 and 9 | |
| Areas 1, 2, 3, 5, 6, 7 and 9 | |
| Areas 1, 2, 3, 5, 6, 7 and 9 | |
| Areas 1, 2, 3, 5, 6, 7 and 9 | |
Geography
| Base Camp | |
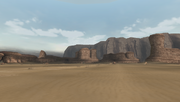
| A small section between low cliffs, a view of the vast desert on a border path leads further into the Desert, while the dried well can be used to reach Area 6. | |
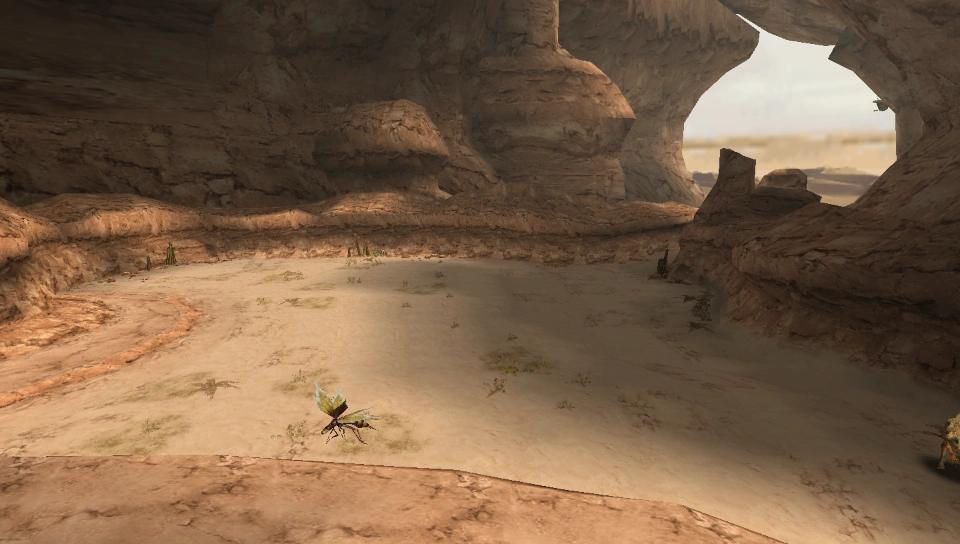
| Area 1 | |
| A narrow oasis where herbivores roam, on the other side is a massive ominous cliff. | |
| Monsters: Apceros, Cephalos, Ceanataur, Genprey. | |
| Area 2 | |
| A wide open desert, the south and west sections are bordered by cliffs and canyons, while the north and east lead to a distant canyon and the open desert respectively. | |
| Monsters: Cephalos, Great Thunderbug. | |
| Area 3 | |
| A small section in the canyons, there is a ledge which can be used to trick Diablos, Monoblos and Tigrex. | |
| Monsters: Bullfango, Vespoid, Great Thunderbug, Genprey. | |
| Area 4 | |
| A narrow cave-like path between ominous cliffs that close in on the ceiling. | |
| Monsters: Genprey, Apceros, Great Thunderbug, Melynx. | |
| Area 5 | |
| Another wide open desert with a few rocks on the northern side and a massive drop off to the black depths on the south. | |
| Monsters: Cephalos, Genprey, Great Thunderbug. | |
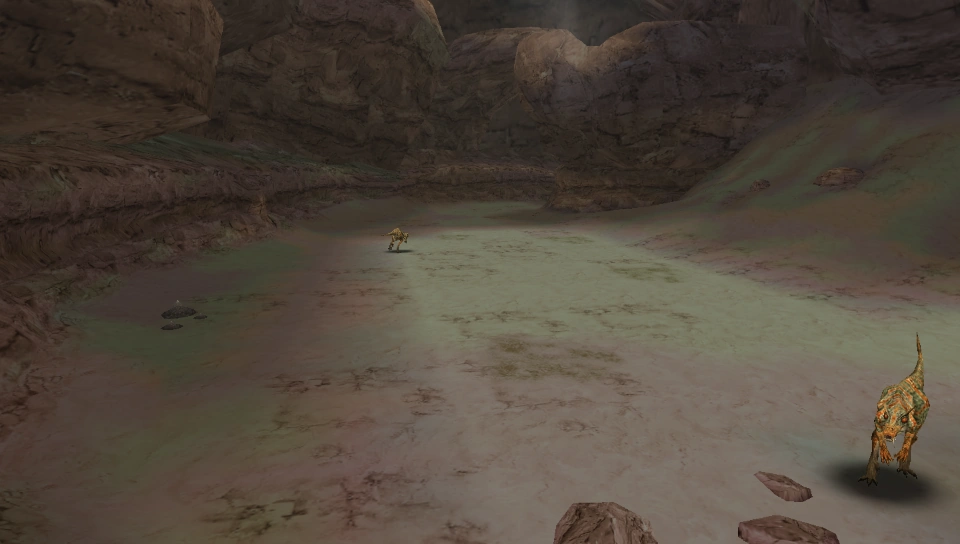
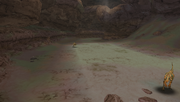
| Area 6 | |
| A large cave filled with water, during the night the water level goes up, dividing this area into two separate sections. | |
| Monsters: Apceros, Genprey, Hermitaur, Vespoid, Great Thunderbug, Melynx. | |
| Area 7 | |
| A wide open section in the canyons with a body of water, there is a rock formation in the middle which can be used to trick wyverns. | |
| Monsters: Apceros, Genprey, Cephalos, Great Thunderbug. | |
| Area 8 | |
| A Felyne village, the mud houses line the perimeter and the Veggie Elder wanders around here. | |
| Area 9 | |
| An open section between small cliffs, monsters come here to rest. | |
| Monsters: Vespoid, Genprey, Great Thunderbug. | |
| Area 10 | |
| Another cave-like area where Herbivores have set their nest. | |
| Monsters: Apceros, Melynx, Genprey. | |
| Secret Area | |
| An enclosed rocky area, inhabited by Felynes. It is connected to Area 5. As with all Secret Areas, it is possible to spawn here at the beginning of a quest in High-rank. A single Mining Point, a bug-gathering point, and two Plants can be exploited here. Umbrellas, Masters Skulls and Felyne Fur Rubies can be picked up among the Plants. | |
| Monsters: Felyne, Melynx. | |


Gallery
Monster Hunter Freedom Unite
")
")
")
")
")
")
")
")
")
")
")
Monster Hunter Generations Ultimate
")
")
")
Music Themes
| Title | |
|---|---|
| |
MHFU/MHF-G8: Desert Music Theme (HR1-4) |
| |
MHF-G8: Desert Music Theme (HR5~) |
| |
MHF-G8: Desert Music Theme (G-rank) |
Videos
| Video | |

| |
| Title | White Night Dune by octaneblue2 |
| Video | |

| |
| Title | White Night Dune by octaneblue2 |
See Also