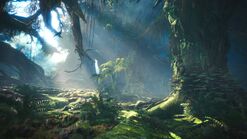
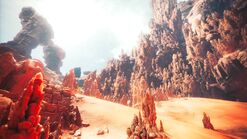
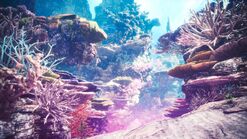
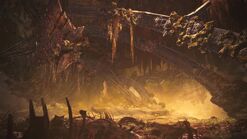
The Guiding Lands (Japanese 導きの地) is a mysterious area first introduced in Monster Hunter World: Iceborne. This area, a mishmash of features from the Ancient Forest, Wildspire Waste, Coral Highlands, Rotten Vale, Elder's Recess, and Hoarfrost Reach, is where powerful monsters gather together. Like Moga Woods and the Everwood, it serves as an area to freely hunt randomly-appearing monsters and obtain unique items.
Regions[]
Intersection[]
Area 1, 2, 3, 4 and 5 are accessible by Monsters bound to any one Region, they will likely however move around the closest ones to the their spawning habitat. Because of this, monsters that otherwise could not meet in-game often clash in these areas. These areas mostly provide gathering points for combination and consumables.
Forest Region[]
While much of the Intersection Area looks like part of the Forest Region, Area 6 and 7 are the ones to provide unique gathering materials of the Region, and is off-limits for monsters that did not spawn in it. The Region is directly connected to Intersection 1 and 2.
Wildspire Region[]
Area 8 and 9 are part of the Wildspire Region, located in the furthest South-west of the Guiding Lands. The closest Intersections are area 2 and 3.
Coral Region[]
Area 10 and 11 of the Guiding Land's East are part of the Coral Region. It is linked to Intersection 4.
Rotted Region[]
Covering Area 12 and 13 of the Guiding Lands lower East. This Region has Effluvium hazard similar to the middle levels of the Rotten Vale. It is connected to Intersection 3 and 5 via narrow and slanted path.
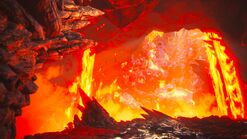
Volcanic Region[]
Only accessible after the the Special Assignment "Reveal Thyself, Destroyer" of the first major update. The Region covers Area 14 and 15 and is linked to intersection 5. Damaging heat is constantly generated in the region, as with the volcanic caverns of Elder's Recess.
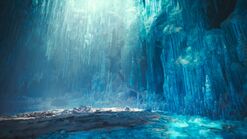
Tundra Region[]
Only accessible after the the Special Assignment "Across the Lost Path" of the second major update. The Region covers Area 16 and 17 and is linked to intersection 1. This region is modeled after the icy caves and rocky summit of the Hoarfrost Reach, and is just as cold.
Region Monster List[]
A list of each region's available monsters and their approximate spawn rates, based on the Hunter's Notes. Monster names in bold are Tempered monsters. Monster names in "colored" are monsters that are region specific monsters. These monsters are more efficient for leveling up the Guiding Lands's region, thus they are ideal targets for such purpose. This also applies to their Tempered forms if they have one.
Forest Region[]
| Level | ★★★ | ★★ | ★ |
|---|---|---|---|
| Lv 1 | Great Jagras, Pukei-Pukei, Tobi-Kadachi | Anjanath | |
| Lv 2 | Great Jagras, Pukei-Pukei, Tobi-Kadachi, Anjanath, Banbaro | Rathian, Rathalos, Nightshade Paolumu, Nargacuga, Zinogre | Fulgur Anjanath |
| Lv 3 | Anjanath, Rathalos, Nargacuga, Zinogre, Yian Garuga | Great Jagras, Pukei-Pukei, Tobi-Kadachi, Rathian, Azure Rathalos, Banbaro, Nightshade Paolumu, Glavenus, Fulgur Anjanath | Tigrex, Ebony Odogaron |
| Lv 4 | Pukei-Pukei, Tobi-Kadachi, Rathalos, Azure Rathalos, Banbaro, Nargacuga, Zinogre, Yian Garuga | Anjanath, Ebony Odogaron | Great Jagras, Rathian, Nightshade Paolumu, Glavenus, Tigrex, Fulgur Anjanath, Rajang |
| Lv 5 | Anjanath, Rathalos, Azure Rathalos, Kushala Daora, Velkhana, Zinogre, Yian Garuga | Pukei-Pukei, Tobi-Kadachi, Rathian, Banbaro, Nightshade Paolumu, Nargacuga, Fulgur Anjanath, Savage Deviljho, Rajang | Great Jagras, Glavenus, Tigrex, Ebony Odogaron, Ruiner Nergigante |
| Lv 6 | Azure Rathalos, Kushala Daora, Nargacuga, Savage Deviljho, Zinogre, Scarred Yian Garuga | Anjanath, Rathalos, Ebony Odogaron, Velkhana, Rajang | Great Jagras, Pukei-Pukei, Tobi-Kadachi, Rathian, Banbaro, Nightshade Paolumu, Glavenus, Tigrex, Fulgur Anjanath, Ruiner Nergigante |
| Lv 7 | Kushala Daora, Ruiner Nergigante (sometimes Tempered), Scarred Yian Garuga, Rajang | Azure Rathalos, Nargacuga, Velkhana, Savage Deviljho, Zinogre | Great Jagras, Pukei-Pukei, Tobi-Kadachi, Anjanath, Rathian, Rathalos, Banbaro, Nightshade Paolumu, Glavenus, Tigrex, Fulgur Anjanath, Ebony Odogaron |
Region Specific Monsters[]
Wildspire Region[]
| Level | ★★★ | ★★ | ★ |
|---|---|---|---|
| Lv 1 | Kulu-Ya-Ku, Barroth | Pukei-Pukei | Rathian, Nightshade Paolumu |
| Lv 2 | Kulu-Ya-Ku, Barroth, Rathian, Nightshade Paolumu | Anjanath, Diablos, Pink Rathian, Glavenus | Pukei-Pukei, Banbaro, Fulgur Anjanath |
| Lv 3 | Rathian, Diablos, Nightshade Paolumu, Glavenus | Kulu-Ya-Ku, Barroth, Anjanath, Pink Rathian, Black Diablos, Fulgur Anjanath | Pukei-Pukei, Banbaro, Tigrex, Ebony Odogaron |
| Lv 4 | Barroth, Diablos, Black Diablos, Glavenus | Pukei-Pukei, Rathian, Nightshade Paolumu, Ebony Odogaron | Kulu-Ya-Ku, Anjanath, Pink Rathian, Banbaro, Tigrex, Fulgur Anjanath, Rajang |
| Lv 5 | Rathian, Diablos, Black Diablos, Teostra, Lunastra, Nightshade Paolumu, Velkhana | Barroth, Anjanath, Pink Rathian, Glavenus, Fulgur Anjanath, Savage Deviljho, Rajang | Kulu-Ya-Ku, Pukei-Pukei, Banbaro, Tigrex, Ebony Odogaron, Ruiner Nergigante |
| Lv 6 | Black Diablos, Teostra, Lunastra, Glavenus, Savage Deviljho, Gold Rathian | Rathian, Diablos, Nightshade Paolumu, Ebony Odogaron, Velkhana, Rajang | Kulu-Ya-Ku, Pukei-Pukei, Barroth, Anjanath, Pink Rathian, Banbaro, Tigrex, Fulgur Anjanath, Ruiner Nergigante |
| Lv 7 | Teostra, Lunastra, Ruiner Nergigante (sometimes Tempered), Gold Rathian, Rajang | Black Diablos, Glavenus, Velkhana, Savage Deviljho | Kulu-Ya-Ku, Pukei-Pukei, Barroth, Anjanath, Rathian, Diablos, Pink Rathian, Banbaro, Nightshade Paolumu, Tigrex, Fulgur Anjanath, Ebony Odogaron |
Region Specific Monsters[]
![]()
![]()
![]()
![]()
![]()
*Gold Rathian is not exclusive to the Wildspire region but boosts the region level as if it was.
Coral Region[]
| Level | ★★★ | ★★ | ★ |
|---|---|---|---|
| Lv 1 | Tzitzi-Ya-Ku | Banbaro | Paolumu, Coral Pukei-Pukei |
| Lv 2 | Tzitzi-Ya-Ku, Paolumu, Pink Rathian, Coral Pukei-Pukei | Legiana | Banbaro, Fulgur Anjanath |
| Lv 3 | Paolumu, Legiana, Pink Rathian, Coral Pukei-Pukei, Nargacuga | Tzitzi-Ya-Ku, Odogaron, Fulgur Anjanath, Ebony Odogaron, Zinogre | Banbaro |
| Lv 4 | Paolumu, Legiana, Ebony Odogaron | Pink Rathian, Coral Pukei-Pukei, Nargacuga, Zinogre | Tzitzi-Ya-Ku, Odogaron, Banbaro, Fulgur Anjanath, Rajang |
| Lv 5 | Legiana, Kirin, Pink Rathian, Coral Pukei-Pukei, Velkhana, Namielle | Paolumu, Fulgur Anjanath, Ebony Odogaron, Savage Deviljho, Zinogre, Rajang | Tzitzi-Ya-Ku, Odogaron, Banbaro, Nargacuga, Ruiner Nergigante |
| Lv 6 | Kirin, Namielle, Savage Deviljho, Silver Rathalos | Legiana, Pink Rathian, Coral Pukei-Pukei, Ebony Odogaron, Velkhana, Zinogre, Rajang | Tzitzi-Ya-Ku, Paolumu, Odogaron, Banbaro, Nargacuga, Fulgur Anjanath, Ruiner Nergigante |
| Lv 7 | Kirin, Namielle, Ruiner Nergigante (sometimes Tempered), Silver Rathalos, Rajang | Velkhana, Savage Deviljho | Tzitzi-Ya-Ku, Paolumu, Legiana, Odogaron, Pink Rathian, Banbaro, Coral Pukei-Pukei, Nargacuga, Fulgur Anjanath, Ebony Odogaron, Zinogre |
Region Specific Monsters[]
![]()
![]()
![]()
![]()
![]()
![]()
*Silver Rathalos is not exclusive to the Coral region but boosts the region level as if it was.
Rotted Region[]
| Level | ★★★ | ★★ | ★ |
|---|---|---|---|
| Lv 1 | Great Girros | Banbaro | Radobaan |
| Lv 2 | Great Girros, Radobaan | Odogaron, Banbaro, Tigrex, Fulgur Anjanath | |
| Lv 3 | Radobaan, Odogaron, Tigrex | Great Girros, Fulgur Anjanath | Banbaro, Acidic Glavenus, Ebony Odogaron |
| Lv 4 | Radobaan, Odogaron, Tigrex, Acidic Glavenus | Ebony Odogaron | Great Girros, Banbaro, Fulgur Anjanath, Rajang |
| Lv 5 | Odogaron, Acidic Glavenus, Velkhana, Blackveil Vaal Hazak | Radobaan, Tigrex, Fulgur Anjanath, Savage Deviljho, Rajang | Great Girros, Banbaro, Ebony Odogaron, Ruiner Nergigante |
| Lv 6 | Tigrex, Acidic Glavenus, Blackveil Vaal Hazak, Savage Deviljho, Brute Tigrex | Odogaron, Ebony Odogaron, Velkhana, Rajang | Great Girros, Radobaan, Banbaro, Fulgur Anjanath, Ruiner Nergigante |
| Lv 7 | Blackveil Vaal Hazak, Ruiner Nergigante (sometimes Tempered), Brute Tigrex, Rajang | Tigrex, Acidic Glavenus, Velkhana, Savage Deviljho | Great Girros, Radobaan, Odogaron, Banbaro, Fulgur Anjanath, Ebony Odogaron |
Region Specific Monsters[]
Volcanic Region[]
| Level | ★★★ | ★★ | ★ |
|---|---|---|---|
| Lv 1 | Dodogama | Lavasioth, Banbaro | |
| Lv 2 | Dodogama, Lavasioth | Uragaan | Banbaro, Brachydios, Fulgur Anjanath |
| Lv 3 | Rathalos, Lavasioth, Uragaan, Brachydios | Dodogama, Glavenus, Fulgur Anjanath | Banbaro, Tigrex, Ebony Odogaron, Rajang |
| Lv 4 | Lavasioth, Uragaan, Azure Rathalos, Brachydios | Rathalos, Ebony Odogaron, Seething Bazelgeuse, Rajang | Dodogama, Banbaro, Glavenus, Tigrex, Fulgur Anjanath |
| Lv 5 | Rathalos, Uragaan, Teostra, Lunastra, Kushala Daora, Seething Bazelgeuse, Rajang | Lavasioth, Azure Rathalos, Brachydios, Fulgur Anjanath, Savage Deviljho | Dodogama, Banbaro, Glavenus, Tigrex, Ebony Odogaron, Ruiner Nergigante |
| Lv 6 | Azure Rathalos, Brachydios, Seething Bazelgeuse, Savage Deviljho, Rajang | Rathalos, Uragaan, Teostra, Lunastra, Kushala Daora, Ebony Odogaron, Gold Rathian, Silver Rathalos | Dodogama, Lavasioth, Banbaro, Glavenus, Tigrex, Fulgur Anjanath, Ruiner Nergigante |
| Lv 7 | Teostra, Lunastra, Kushala Daora, Seething Bazelgeuse, Ruiner Nergigante (sometimes Tempered), Gold Rathian, Silver Rathalos, Rajang | Azure Rathalos, Brachydios, Savage Deviljho | Rathalos, Dodogama, Lavasioth, Uragaan, Banbaro, Glavenus, Tigrex, Fulgur Anjanath, Ebony Odogaron |
Region Specific Monsters[]
![]()
![]()
![]()
![]()
![]()
![]()
*Rajang is not exclusive to the Volcanic region but boosts the region level as if it was.
Tundra Region[]
| Level | ★★★ | ★★ | ★ |
|---|---|---|---|
| Lv 1 | Banbaro | Viper Tobi-Kadachi | |
| Lv 2 | Viper Tobi-Kadachi | Legiana, Banbaro, Barioth | Fulgur Anjanath |
| Lv 3 | Legiana, Viper Tobi-Kadachi, Barioth, Tigrex | Shrieking Legiana, Fulgur Anjanath, Stygian Zinogre | Banbaro, Ebony Odogaron |
| Lv 4 | Banbaro, Barioth, Shrieking Legiana, Stygian Zinogre | Legiana, Viper Tobi-Kadachi, Tigrex, Ebony Odogaron | Fulgur Anjanath, Rajang |
| Lv 5 | Legiana, Viper Tobi-Kadachi, Shrieking Legiana, Velkhana, Stygian Zinogre | Banbaro, Barioth, Fulgur Anjanath, Savage Deviljho, Rajang | Tigrex, Ebony Odogaron, Ruiner Nergigante |
| Lv 6 | Barioth, Shrieking Legiana, Velkhana, Savage Deviljho, Stygian Zinogre | Legiana, Viper Tobi-Kadachi, Tigrex, Ebony Odogaron, Rajang | Banbaro, Fulgur Anjanath, Ruiner Nergigante |
| Lv 7 | Velkhana, Ruiner Nergigante, Rajang, Stygian Zinogre | Barioth, Shrieking Legiana, Savage Deviljho | Legiana, Banbaro, Viper Tobi-Kadachi, Tigrex, Fulgur Anjanath, Ebony Odogaron |
Region Specific Monsters[]
Guiding land Materials[]
Materials from guiding lands monsters are used to augment weapons and armour and in a few cases is needed to upgrade the weapons themselves, listed below is a guide for the drop rates as well as a key to determine which group of monsters rewards which bones/gems.
Drop Rates[]
| Item | Low Region Level | Medium Region Level | High Region Level |
| Guiding Lands Part | 37% | 63% | 100% |
| Bone Material | 63% | 37% | 0% |
| Item | Threat Level 1 | Threat level 2 | Threat Level 3 |
| Guiding Lands Part | 54% | 61% | 64% |
| Bone Material | 25% (Slogbone) |
37% (Solidbone) |
37% (Dragonvein) |
| Spiritvein Gem material | 21% (Shard) |
9% (Normal) |
3% (Great) |
Key to threat level[]
Monsters in Brackets have no Tempered Version
| Non-Tempered bone | Tempered Bone | Tempered Spirtvein Gem | Monsters |
| Fierce Dragonvein Bone | Spiritvein Slogbone | Spiritvein Gem Shard | (Great Jagras), (Kulu-Ya-Ku), Pukei-Pukei, Barroth, Tobi-Kadachi, Anjanath, Rathian, (Tzitzi-Ya-Ku), Paolumu, (Great Girros), Radobaan, (Dodogama), Pink Rathian, Banbaro, Viper Tobi-Kadachi, Nightshade Paolumu, Coral Pukei-Pukei |
| Heavy Dragonvein Bone | Spiritvein Solidbone | Spiritvein Gem | Legiana, Odogaron, Rathalos, Diablos, Lavasioth, Uragaan, Barioth, Nargacuga, Glavenus, Tigrex, Brachydios, Fulgur Anjanath |
| Dragonvein Solidbone | Azure Rathalos, Black Diablos, Shrieking Legiana, Acidic Glavenus, Ebony Odogaron, Zinogre, (Yian Garuga), Scarred Yian Garuga (Tempered Only), Brute Tigrex | ||
| Great Spiritvein Gem | Seething Bazelgeuse, Savage Deviljho, Gold Rathian, Silver Rathalos, Rajang, Stygian Zinogre | ||
| Elder Dragonvein Bone | Elder Spiritvein Bone | Kirin, Teostra, Kushala Daora, Lunastra, Velkhana, Blackveil Vaal Hazak, Namielle, Ruiner Nergigante |
Gallery[]
Food Chain[]
Bottom[]
- Banbaro
- Barroth
- Dodogama
- Great Girros
- Great Jagras
- Kulu-Ya-Ku
- Paolumu
- Nightshade Paolumu
- Pukei-Pukei
- Coral Pukei-Pukei
- Tobi-Kadachi
- Viper Tobi-Kadachi
- Tzitzi-Ya-Ku
Middle[]
Top[]
- Barioth
- Brachydios
- Raging Brachydios
- Diablos
- Black Diablos
- Fulgur Anjanath
- Glavenus
- Acidic Glavenus
- Gold Rathian
- Legiana
- Shrieking Legiana
- Nargacuga
- Odogaron
- Ebony Odogaron
- Rajang
- Rathalos
- Azure Rathalos
- Silver Rathalos
- Savage Deviljho
- Seething Bazelgeuse
- Tigrex
- Brute Tigrex
- Yian Garuga
- Scarred Yian Garuga
- Zinogre
- Stygian Zinogre
Special[]
Camps[]
- First Western Camp (1) - Starting Camp
- Eastern Camp (3) - Up some vines and through a crawl space on the path between zones 3 and 4
Notes[]
- The main areas of the Guiding Lands can be leveled up by hunting monsters and gathering from mining outcrops and bonepiles. This increases the quality of the monsters and items that appear. Tempered monsters appear at high levels.
- When the combined levels of the Guiding Lands reach a certain amount, making progress in one area will lower the level of other areas unless a monster belongs to multiple regions (Savage Deviljho, Fulgur Anjanath, Banbaro, etc). Hunting monsters will very slightly increase the cap.
- The first Iceborne title update added the ability to lock down region levels and reduced the level-up requirements for higher levels, while the second Iceborne title update added the ability to instantly lower region levels.
- Gathering special tracks, hunting monsters, and breaking parts eventually unlocks the ability to lure out a specific monster once the analysis progress gauge is filled.
- If the monster matches the special tracks being studied, breaking a part of them will instantly unlock the lure.
- Capturing or carving a Tempered monster and/or their severed tail instantly unlocks a lure.
- Canteen ingredients will be replenished once the player obtains 250 Research Points.
- The monster used for Tailraider Ride is chosen at random from the pool (Jagras, Kestodon, Shamos, Girros, Gastodon, and Wulg; they can be chosen even when a region is not available) and will remain until the player leaves the map.
- Large monsters in the Guiding Lands drop unique materials that can be used to augment weapons and craft endgame gear.
- Flinch Shotting monsters into walls and breaking parts will drop shinies containing said materials.
- Guiding Lands large monsters do not drop their normal materials, though Palicoes can use the Plunderblade to obtain them.
- Items used to craft the Master Rank Zorah Magdaros set can be found in the Guiding Lands.
- A Zorah Magdaros skull can be found in the Rotten region, while a rock structure heavily resembling its shell can be found in the Volcanic region.
- Just like the area itself, the theme for the Guiding Lands features parts of the Ancient Forest's, Wildspire Waste's, Coral Highland's, and Rotten Vale's themes.
- After subsequent Iceborne title updates, the theme was extended to include parts of the Elder's Recess and Hoarfrost Reach themes.
- An Elder's Recess-based area was added in the first Iceborne title update, while a Hoarfrost Reach-based area was added in the second.
- Jyuratodus, Beotodus, Furious Rajang, and Frostfang Barioth are the only monsters that don't appear in the Guiding Lands. Lavasioth is the only piscine wyvern that appears in the Guiding Lands.
- Raging Brachydios can only be found in the Guiding Lands through its Special Assignment and Optional Quest, and cannot be found in Guiding Lands expeditions.
- Unique species of endemic life, called Molies, can be found in the Guiding Lands. The common species will appear in every region, while rare variations exclusive to each region will start spawning when it reaches level 5 or higher.
- It is believed Molies are responsible for shaping the landscape of the Guiding Lands.
References[]
