(Monster Hunter 4 Ultimate Weapons) Tag: sourceedit |
No edit summary |
||
| (14 intermediate revisions by 3 users not shown) | |||
| Line 1: | Line 1: | ||
{{Topics-Zinogre}} |
{{Topics-Zinogre}} |
||
| − | |||
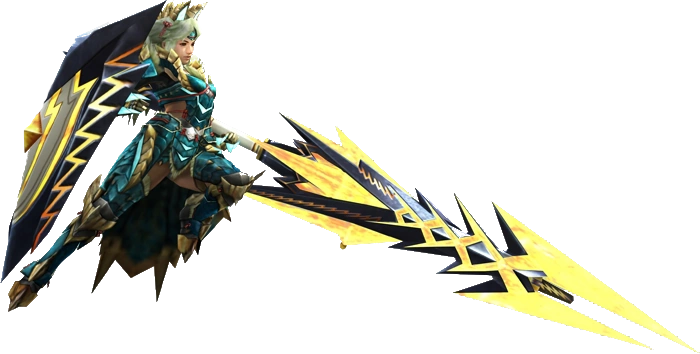
{{MonEquipment |
{{MonEquipment |
||
| − | |Image = [[File:MH3G-Gunlance Equipment Render 001.png| |
+ | |Image = [[File:MH3G-Gunlance Equipment Render 001.png|250x250px]] |
|MonsterName = Zinogre |
|MonsterName = Zinogre |
||
}} |
}} |
||
| Line 14: | Line 13: | ||
|- |
|- |
||
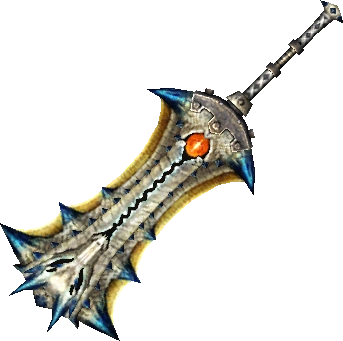
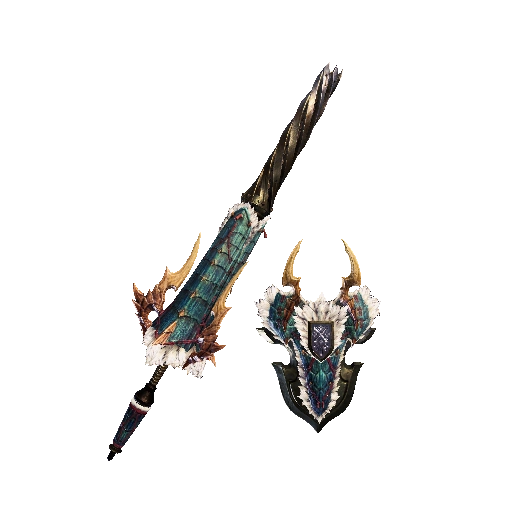
|width="110px" height="110px" valign="center"| [[File:MH3U-Great Sword Render 015.png|center|110x110px]] |
|width="110px" height="110px" valign="center"| [[File:MH3U-Great Sword Render 015.png|center|110x110px]] |
||
| − | |width="10px"| |
+ | |width="10px"| |
|valign="center"| {{MH3UWL|Usurper's Storm}}<br />{{L}} {{MH3UWL|Despot's Blackstorm}}<br />{{Indent}}{{L}} {{MH3UWL|Oppressor's Forger}}<br />{{Indent}}{{Indent}}{{L}} {{MH3UWL|Orcus Tonitrus}} |
|valign="center"| {{MH3UWL|Usurper's Storm}}<br />{{L}} {{MH3UWL|Despot's Blackstorm}}<br />{{Indent}}{{L}} {{MH3UWL|Oppressor's Forger}}<br />{{Indent}}{{Indent}}{{L}} {{MH3UWL|Orcus Tonitrus}} |
||
|} |
|} |
||
| Line 22: | Line 21: | ||
|- |
|- |
||
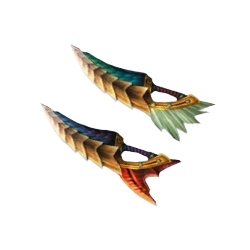
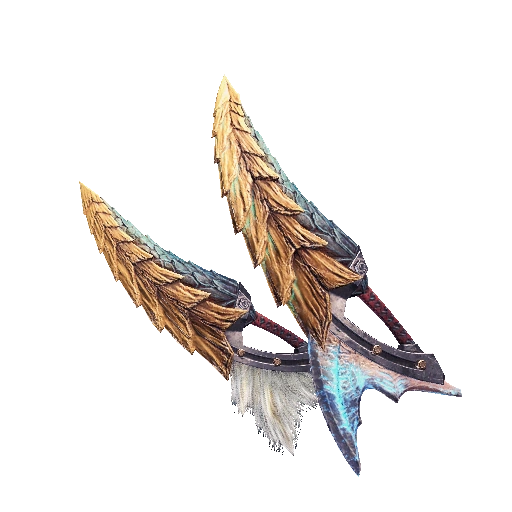
|width="110px" height="110px" valign="center"| [[File:MH4-Long Sword Render 020.png|center|110x110px]] |
|width="110px" height="110px" valign="center"| [[File:MH4-Long Sword Render 020.png|center|110x110px]] |
||
| − | |width="10px"| |
+ | |width="10px"| |
|valign="center"| {{MH3UWL|Usurper's Boltslicer}}<br />{{L}} {{MH3UWL|Despot's Boltbreaker}}<br />{{Indent}}{{L}} {{MH3UWL|Oppressor's Law}} |
|valign="center"| {{MH3UWL|Usurper's Boltslicer}}<br />{{L}} {{MH3UWL|Despot's Boltbreaker}}<br />{{Indent}}{{L}} {{MH3UWL|Oppressor's Law}} |
||
|} |
|} |
||
| Line 31: | Line 30: | ||
|- |
|- |
||
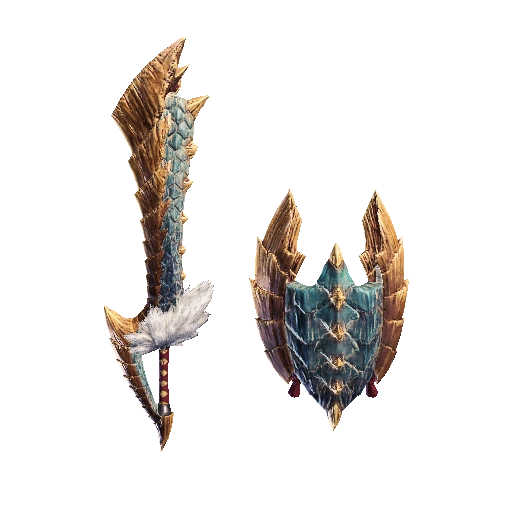
|width="110px" height="110px" valign="center"| [[File:MH4-Sword and Shield Render 013.png|center|110x110px]] |
|width="110px" height="110px" valign="center"| [[File:MH4-Sword and Shield Render 013.png|center|110x110px]] |
||
| − | |width="10px"| |
+ | |width="10px"| |
|valign="center"| {{MH3UWL|Usurper's Firebolt}}<br />{{L}} {{MH3UWL|Despot's Crookbolt}}<br />{{Indent}}{{L}} {{MH3UWL|Oppressor's Bounty}} |
|valign="center"| {{MH3UWL|Usurper's Firebolt}}<br />{{L}} {{MH3UWL|Despot's Crookbolt}}<br />{{Indent}}{{L}} {{MH3UWL|Oppressor's Bounty}} |
||
|} |
|} |
||
| Line 54: | Line 53: | ||
|- |
|- |
||
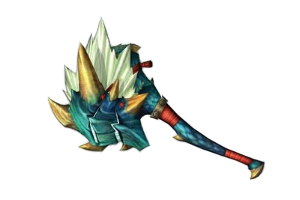
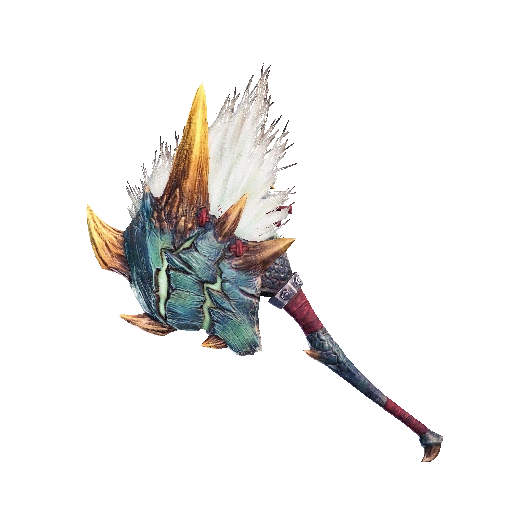
|width="110px" height="110px" valign="center"| [[File:MH4-Hammer Render 012.png|center|110x110px]] |
|width="110px" height="110px" valign="center"| [[File:MH4-Hammer Render 012.png|center|110x110px]] |
||
| − | |width="10px"| |
+ | |width="10px"| |
|valign="center"| {{MH3UWL|Usurper's Thunder}}<br />{{L}} {{MH3UWL|Despot's Crackle}}<br />{{Indent}}{{L}} {{MH3UWL|Oppressor's Sway}} |
|valign="center"| {{MH3UWL|Usurper's Thunder}}<br />{{L}} {{MH3UWL|Despot's Crackle}}<br />{{Indent}}{{L}} {{MH3UWL|Oppressor's Sway}} |
||
|} |
|} |
||
| Line 62: | Line 61: | ||
|- |
|- |
||
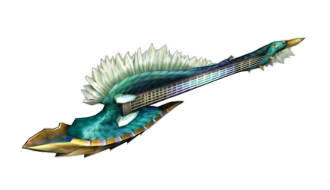
|width="110px" height="110px" valign="center"| [[File:MH4-Hunting Horn Render 010.png|center|110x110px]] |
|width="110px" height="110px" valign="center"| [[File:MH4-Hunting Horn Render 010.png|center|110x110px]] |
||
| − | |width="10px"| |
+ | |width="10px"| |
|valign="center"| {{MH3UWL|Usurper's Growl}}<br />{{L}} {{MH3UWL|Despot's Thunderclap}} |
|valign="center"| {{MH3UWL|Usurper's Growl}}<br />{{L}} {{MH3UWL|Despot's Thunderclap}} |
||
|} |
|} |
||
| Line 71: | Line 70: | ||
|- |
|- |
||
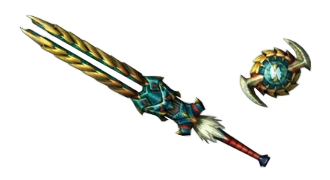
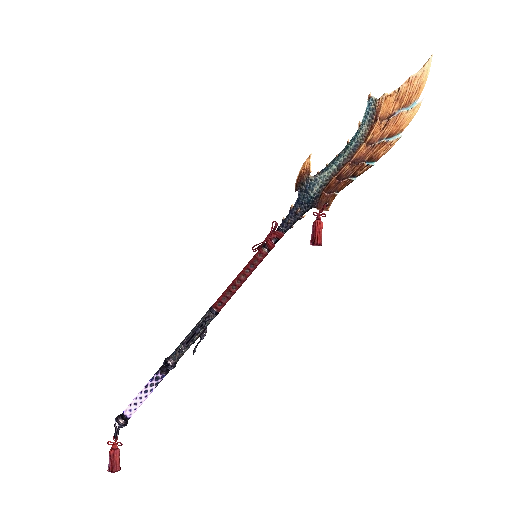
|width="110px" height="110px" valign="center"| [[File:MH4-Lance Render 030.png|center|110x110px]] |
|width="110px" height="110px" valign="center"| [[File:MH4-Lance Render 030.png|center|110x110px]] |
||
| − | |width="10px"| |
+ | |width="10px"| |
|valign="center"| {{MH3UWL|Usurper's Coming}}<br />{{L}} {{MH3UWL|Despot's Cacophony}}<br />{{Indent}}{{L}} {{MH3UWL|Oppressor's Genesis}} |
|valign="center"| {{MH3UWL|Usurper's Coming}}<br />{{L}} {{MH3UWL|Despot's Cacophony}}<br />{{Indent}}{{L}} {{MH3UWL|Oppressor's Genesis}} |
||
|} |
|} |
||
| Line 79: | Line 78: | ||
|- |
|- |
||
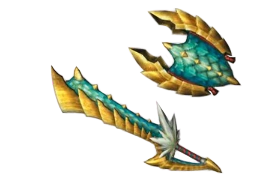
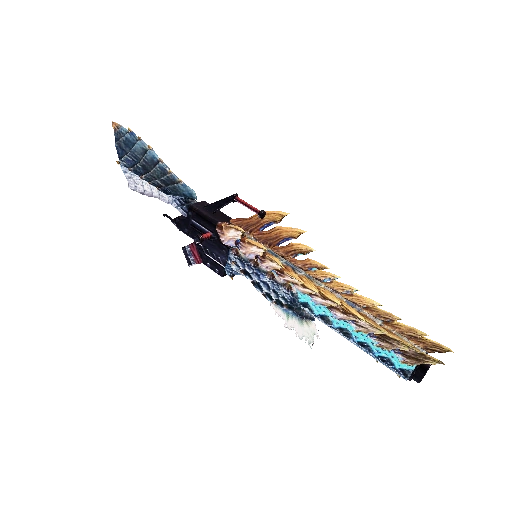
|width="110px" height="110px" valign="center"| [[File:MH4-Gunlance Render 027.png|center|110x110px]] |
|width="110px" height="110px" valign="center"| [[File:MH4-Gunlance Render 027.png|center|110x110px]] |
||
| − | |width="10px"| |
+ | |width="10px"| |
|valign="center"| {{MH3UWL|Usurper’s Roar}}<br />{{L}} {{MH3UWL|Despot’s Phlogiston}}<br />{{Indent}}{{L}} {{MH3UWL|Oppressor’s Skyfall}} |
|valign="center"| {{MH3UWL|Usurper’s Roar}}<br />{{L}} {{MH3UWL|Despot’s Phlogiston}}<br />{{Indent}}{{L}} {{MH3UWL|Oppressor’s Skyfall}} |
||
|} |
|} |
||
| Line 88: | Line 87: | ||
|- |
|- |
||
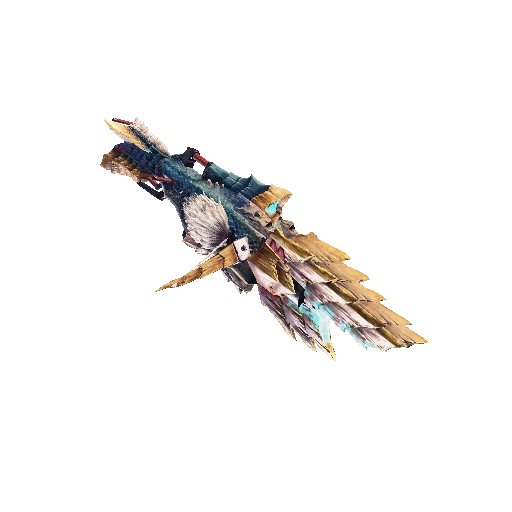
|width="110px" height="110px" valign="center"| [[File:MH4-Switch Axe Render 011.png|center|110x110px]] |
|width="110px" height="110px" valign="center"| [[File:MH4-Switch Axe Render 011.png|center|110x110px]] |
||
| − | |width="10px"| |
+ | |width="10px"| |
|valign="center"| {{MH3UWL|Usurper's Downpour}}<br />{{L}} {{MH3UWL|Despot's Cloudburst}} |
|valign="center"| {{MH3UWL|Usurper's Downpour}}<br />{{L}} {{MH3UWL|Despot's Cloudburst}} |
||
|} |
|} |
||
| Line 96: | Line 95: | ||
|- |
|- |
||
|width="110px" height="110px" valign="center"| [[File:MH4-Light Bowgun Render 007.png|center|110x110px]] |
|width="110px" height="110px" valign="center"| [[File:MH4-Light Bowgun Render 007.png|center|110x110px]] |
||
| − | |width="10px"| |
+ | |width="10px"| |
|valign="center"| {{MH3UWL|Usurper's Crime}}<br />{{L}} {{MH3UWL|Despot's Wildfire}}<br />{{Indent}}{{L}} {{MH3UWL|Oppressor's Rift}}<br />{{Indent}}{{Indent}}{{L}} {{MH3UWL|Orcus Barqus}} |
|valign="center"| {{MH3UWL|Usurper's Crime}}<br />{{L}} {{MH3UWL|Despot's Wildfire}}<br />{{Indent}}{{L}} {{MH3UWL|Oppressor's Rift}}<br />{{Indent}}{{Indent}}{{L}} {{MH3UWL|Orcus Barqus}} |
||
|} |
|} |
||
| Line 105: | Line 104: | ||
|- |
|- |
||
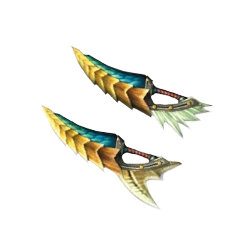
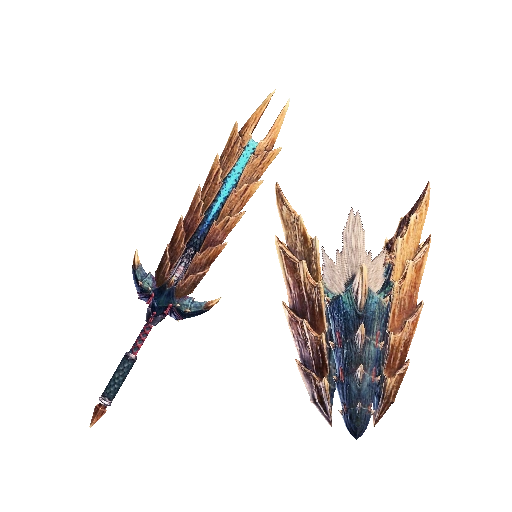
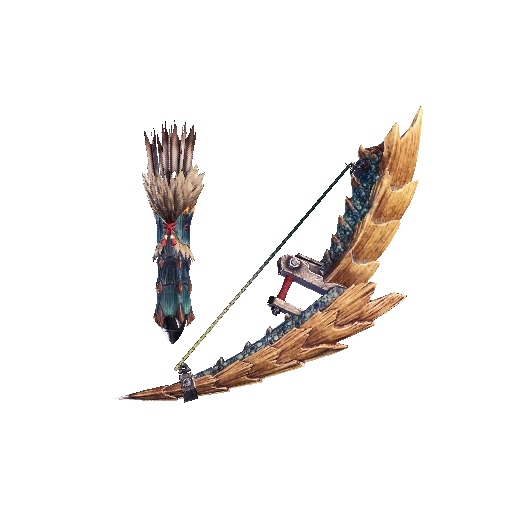
|width="110px" height="110px" valign="center"| [[File:MH4-Bow Render 021.png|center|110x110px]] |
|width="110px" height="110px" valign="center"| [[File:MH4-Bow Render 021.png|center|110x110px]] |
||
| − | |width="10px"| |
+ | |width="10px"| |
|valign="center"| {{MH3UWL|Usurper's Rumble}}<br />{{L}} {{MH3UWL|Despot's Earlybolt}}<br />{{Indent}}{{L}} {{MH3UWL|Oppressor's Answer}} |
|valign="center"| {{MH3UWL|Usurper's Rumble}}<br />{{L}} {{MH3UWL|Despot's Earlybolt}}<br />{{Indent}}{{L}} {{MH3UWL|Oppressor's Answer}} |
||
|} |
|} |
||
| Line 118: | Line 117: | ||
|- |
|- |
||
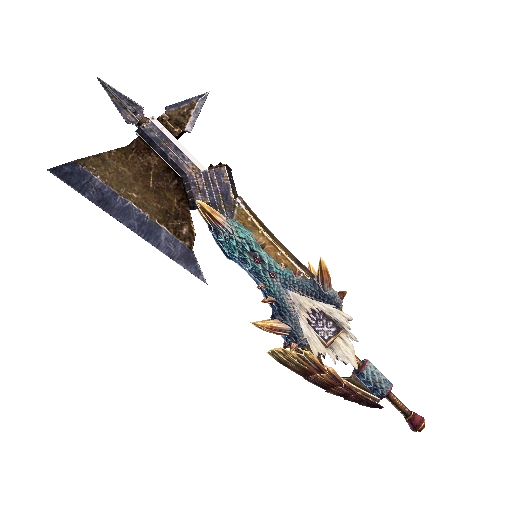
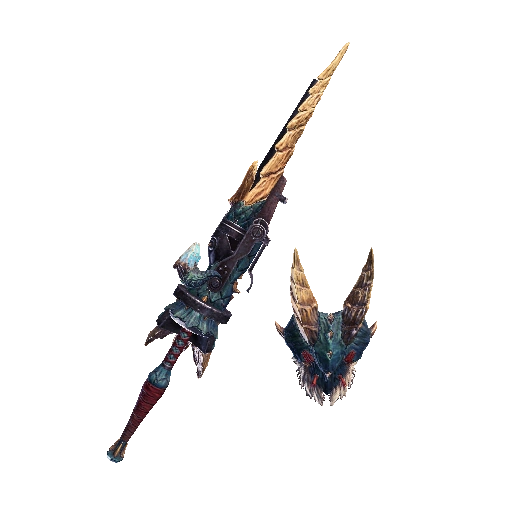
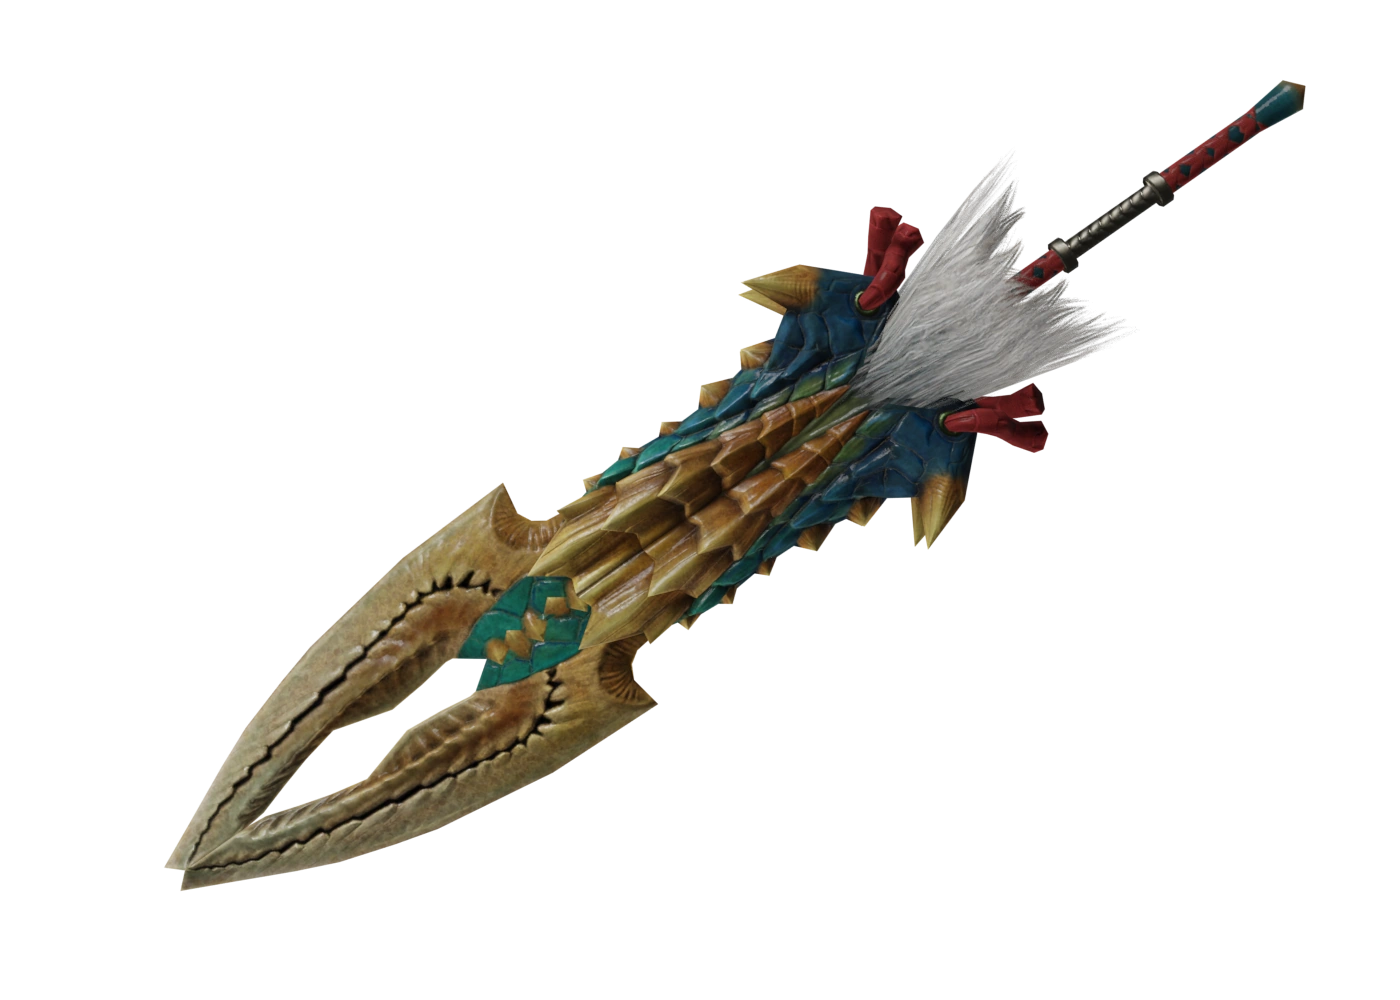
|width="110px" height="110px" valign="center"| [[File:MH4-Great Sword Render 014.png|center|110x110px]] |
|width="110px" height="110px" valign="center"| [[File:MH4-Great Sword Render 014.png|center|110x110px]] |
||
| − | |width="10px"| |
+ | |width="10px"| |
|valign="center"| {{MH4UWL|Usurper's Storm}}<br />{{L}} {{MH4UWL|Despot's Blackstorm}}<br />{{Indent}}{{L}} {{MH4UWL|Oppressor's Forger}}<br />{{Indent}}{{Indent}}{{L}} {{MH4UWL|Orcus Tonitrus}} |
|valign="center"| {{MH4UWL|Usurper's Storm}}<br />{{L}} {{MH4UWL|Despot's Blackstorm}}<br />{{Indent}}{{L}} {{MH4UWL|Oppressor's Forger}}<br />{{Indent}}{{Indent}}{{L}} {{MH4UWL|Orcus Tonitrus}} |
||
|} |
|} |
||
| Line 126: | Line 125: | ||
|- |
|- |
||
|width="110px" height="110px" valign="center"| [[File:MH4-Long Sword Render 020.png|center|110x110px]] |
|width="110px" height="110px" valign="center"| [[File:MH4-Long Sword Render 020.png|center|110x110px]] |
||
| − | |width="10px"| |
+ | |width="10px"| |
|valign="center"| {{MH4UWL|Usurper's Boltslicer}}<br />{{L}} {{MH4UWL|Usurper's Boltslicer+}}<br />{{Indent}}{{L}} {{MH4UWL|Despot's Boltbreaker}}<br />{{Indent}}{{Indent}}{{L}} {{MH4UWL|Oppressor's Law}}<br />{{Indent}}{{Indent}}{{Indent}}{{I}}<br />{{Indent}}{{Indent}}{{Indent}}{{I}} |
|valign="center"| {{MH4UWL|Usurper's Boltslicer}}<br />{{L}} {{MH4UWL|Usurper's Boltslicer+}}<br />{{Indent}}{{L}} {{MH4UWL|Despot's Boltbreaker}}<br />{{Indent}}{{Indent}}{{L}} {{MH4UWL|Oppressor's Law}}<br />{{Indent}}{{Indent}}{{Indent}}{{I}}<br />{{Indent}}{{Indent}}{{Indent}}{{I}} |
||
|- |
|- |
||
| Line 139: | Line 138: | ||
|- |
|- |
||
|width="110px" height="110px" valign="center"| [[File:MH4-Sword and Shield Render 013.png|center|110x110px]] |
|width="110px" height="110px" valign="center"| [[File:MH4-Sword and Shield Render 013.png|center|110x110px]] |
||
| − | |width="10px"| |
+ | |width="10px"| |
|valign="center"| {{MH4UWL|Usurper's Firebolt}}<br />{{L}} {{MH4UWL|Despot's Crookbolt}} |
|valign="center"| {{MH4UWL|Usurper's Firebolt}}<br />{{L}} {{MH4UWL|Despot's Crookbolt}} |
||
|} |
|} |
||
| Line 162: | Line 161: | ||
|- |
|- |
||
|width="110px" height="110px" valign="center"| [[File:MH4-Hammer Render 012.png|center|110x110px]] |
|width="110px" height="110px" valign="center"| [[File:MH4-Hammer Render 012.png|center|110x110px]] |
||
| − | |width="10px"| |
+ | |width="10px"| |
|valign="center"| {{MH4UWL|Usurper's Thunder}}<br />{{L}} {{MH4UWL|Despot's Crackle}}<br />{{Indent}}{{L}} {{MH4UWL|Oppressor's Sway}}<br />{{Indent}}{{Indent}}{{L}} {{MH4UWL|Orcus Adflictus}} |
|valign="center"| {{MH4UWL|Usurper's Thunder}}<br />{{L}} {{MH4UWL|Despot's Crackle}}<br />{{Indent}}{{L}} {{MH4UWL|Oppressor's Sway}}<br />{{Indent}}{{Indent}}{{L}} {{MH4UWL|Orcus Adflictus}} |
||
|} |
|} |
||
| Line 170: | Line 169: | ||
|- |
|- |
||
|width="110px" height="110px" valign="center"| [[File:MH4-Hunting Horn Render 010.png|center|110x110px]] |
|width="110px" height="110px" valign="center"| [[File:MH4-Hunting Horn Render 010.png|center|110x110px]] |
||
| − | |width="10px"| |
+ | |width="10px"| |
|valign="center"| {{MH4UWL|Usurper's Growl}}<br />{{L}} {{MH4UWL|Usurper's Growl+}}<br />{{Indent}}{{L}} {{MH4UWL|Despot's Thunderclap}}<br />{{Indent}}{{Indent}}{{L}} {{MH4UWL|Oppressor's Boon}} |
|valign="center"| {{MH4UWL|Usurper's Growl}}<br />{{L}} {{MH4UWL|Usurper's Growl+}}<br />{{Indent}}{{L}} {{MH4UWL|Despot's Thunderclap}}<br />{{Indent}}{{Indent}}{{L}} {{MH4UWL|Oppressor's Boon}} |
||
|} |
|} |
||
| Line 179: | Line 178: | ||
|- |
|- |
||
|width="110px" height="110px" valign="center"| [[File:MH4-Lance Render 030.png|center|110x110px]] |
|width="110px" height="110px" valign="center"| [[File:MH4-Lance Render 030.png|center|110x110px]] |
||
| − | |width="10px"| |
+ | |width="10px"| |
|valign="center"| {{MH4UWL|Usurper's Coming}}<br />{{L}} {{MH4UWL|Despot's Cacophony}}<br />{{Indent}}{{L}} {{MH4UWL|Oppressor's Genesis}}<br />{{Indent}}{{Indent}}{{L}} {{MH4UWL|Orcus Galeus}} |
|valign="center"| {{MH4UWL|Usurper's Coming}}<br />{{L}} {{MH4UWL|Despot's Cacophony}}<br />{{Indent}}{{L}} {{MH4UWL|Oppressor's Genesis}}<br />{{Indent}}{{Indent}}{{L}} {{MH4UWL|Orcus Galeus}} |
||
|} |
|} |
||
| Line 187: | Line 186: | ||
|- |
|- |
||
|width="110px" height="110px" valign="center"| [[File:MH4-Gunlance Render 027.png|center|110x110px]] |
|width="110px" height="110px" valign="center"| [[File:MH4-Gunlance Render 027.png|center|110x110px]] |
||
| − | |width="10px"| |
+ | |width="10px"| |
|valign="center"| {{MH4UWL|Usurper's Roar}}<br />{{L}} {{MH4UWL|Usurper's Roar+}}<br />{{Indent}}{{L}} {{MH4UWL|Despot's Phlogiston}}<br />{{Indent}}{{Indent}}{{L}} {{MH4UWL|Oppressor’s Skyfall}} |
|valign="center"| {{MH4UWL|Usurper's Roar}}<br />{{L}} {{MH4UWL|Usurper's Roar+}}<br />{{Indent}}{{L}} {{MH4UWL|Despot's Phlogiston}}<br />{{Indent}}{{Indent}}{{L}} {{MH4UWL|Oppressor’s Skyfall}} |
||
|} |
|} |
||
| Line 196: | Line 195: | ||
|- |
|- |
||
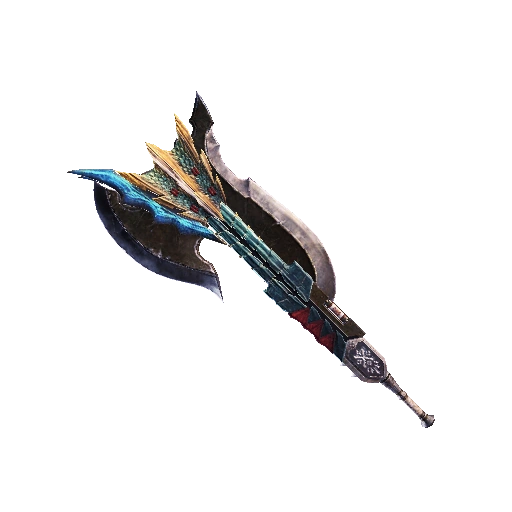
|width="110px" height="110px" valign="center"| [[File:MH4-Switch Axe Render 011.png|center|110x110px]] |
|width="110px" height="110px" valign="center"| [[File:MH4-Switch Axe Render 011.png|center|110x110px]] |
||
| − | |width="10px"| |
+ | |width="10px"| |
|valign="center"| {{MH4UWL|Usurper's Downpour}}<br />{{L}} {{MH4UWL|Despot's Cloudburst}} |
|valign="center"| {{MH4UWL|Usurper's Downpour}}<br />{{L}} {{MH4UWL|Despot's Cloudburst}} |
||
|} |
|} |
||
| Line 204: | Line 203: | ||
|- |
|- |
||
|width="110px" height="110px" valign="center"| [[File:MH4-Light Bowgun Render 007.png|center|110x110px]] |
|width="110px" height="110px" valign="center"| [[File:MH4-Light Bowgun Render 007.png|center|110x110px]] |
||
| − | |width="10px"| |
+ | |width="10px"| |
|valign="center"| {{MH4UWL|Usurper's Crime}}<br />{{L}} {{MH4UWL|Usurper's Crime+}}<br />{{Indent}}{{L}} {{MH4UWL|Despot's Wildfire}}<br />{{Indent}}{{Indent}}{{L}} {{MH4UWL|Oppressor's Rift}}<br />{{Indent}}{{Indent}}{{Indent}}{{I}}<br />{{Indent}}{{Indent}}{{Indent}}{{I}} |
|valign="center"| {{MH4UWL|Usurper's Crime}}<br />{{L}} {{MH4UWL|Usurper's Crime+}}<br />{{Indent}}{{L}} {{MH4UWL|Despot's Wildfire}}<br />{{Indent}}{{Indent}}{{L}} {{MH4UWL|Oppressor's Rift}}<br />{{Indent}}{{Indent}}{{Indent}}{{I}}<br />{{Indent}}{{Indent}}{{Indent}}{{I}} |
||
|- |
|- |
||
| Line 217: | Line 216: | ||
|- |
|- |
||
|width="110px" height="110px" valign="center"| [[File:MH4-Heavy Bowgun Render 010.png|center|110x110px]] |
|width="110px" height="110px" valign="center"| [[File:MH4-Heavy Bowgun Render 010.png|center|110x110px]] |
||
| − | |width="10px"| |
+ | |width="10px"| |
|valign="center"| {{MH4UWL|Mightning}}<br />{{L}} {{MH4UWL|Loyal Thunder}}<br />{{Indent}}{{L}} {{MH4UWL|Oppressor's Wedge}}<br />{{Indent}}{{Indent}}{{L}} {{MH4UWL|Orcus Quarcus}} |
|valign="center"| {{MH4UWL|Mightning}}<br />{{L}} {{MH4UWL|Loyal Thunder}}<br />{{Indent}}{{L}} {{MH4UWL|Oppressor's Wedge}}<br />{{Indent}}{{Indent}}{{L}} {{MH4UWL|Orcus Quarcus}} |
||
|} |
|} |
||
| Line 225: | Line 224: | ||
|- |
|- |
||
|width="110px" height="110px" valign="center"| [[File:MH4-Bow Render 021.png|center|110x110px]] |
|width="110px" height="110px" valign="center"| [[File:MH4-Bow Render 021.png|center|110x110px]] |
||
| − | |width="10px"| |
+ | |width="10px"| |
|valign="center"| {{MH4UWL|Distant Thunder I}}<br />{{L}} {{MH4UWL|Distant Thunder II}}<br />{{Indent}}{{L}} {{MH4UWL|Despot's Earlybolt}}<br />{{Indent}}{{Indent}}{{L}} {{MH4UWL|Oppressor's Wing}}<br />{{Indent}}{{Indent}}{{Indent}}{{I}}<br />{{Indent}}{{Indent}}{{Indent}}{{I}} |
|valign="center"| {{MH4UWL|Distant Thunder I}}<br />{{L}} {{MH4UWL|Distant Thunder II}}<br />{{Indent}}{{L}} {{MH4UWL|Despot's Earlybolt}}<br />{{Indent}}{{Indent}}{{L}} {{MH4UWL|Oppressor's Wing}}<br />{{Indent}}{{Indent}}{{Indent}}{{I}}<br />{{Indent}}{{Indent}}{{Indent}}{{I}} |
||
|- |
|- |
||
| Line 235: | Line 234: | ||
{{-}} |
{{-}} |
||
| + | |||
| + | ==Monster Hunter Generations Weapons== |
||
| + | {| style="font-size:9.5pt;" align="center" width="100%" |
||
| + | | valign="top" | |
||
| + | {| width="100%" valign="top" |
||
| + | | colspan="3" style="font-size:11pt; text-align:left;" | '''Great Sword''' |
||
| + | |- |
||
| + | | height="110px" width="110px" valign="center" | [[File:MH4-Great Sword Render 014.png|center|110x110px]] |
||
| + | | width="10px" | |
||
| + | | valign="center" | {{MHGenWL|Usurper's Storm}}<br />{{L}} {{MHGenWL|Despot's Blackstorm}} |
||
| + | |} |
||
| + | | valign="top" | |
||
| + | {| width="100%" valign="top" |
||
| + | | colspan="3" style="font-size:11pt; text-align:left;" | '''Long Sword''' |
||
| + | |- |
||
| + | | height="110px" width="110px" valign="center" | [[File:MH4-Long Sword Render 020.png|center|110x110px]] |
||
| + | | width="10px" | |
||
| + | | valign="center" | {{MHGenWL|Usurper's Boltslicer}}<br />{{L}} {{MHGenWL|Despot's Boltbreaker}} |
||
| + | |} |
||
| + | |- |
||
| + | | valign="top" | |
||
| + | {| width="100%" valign="top" |
||
| + | | colspan="3" style="font-size:11pt; text-align:left;" | '''Sword and Shield''' |
||
| + | |- |
||
| + | | height="110px" width="110px" valign="center" | [[File:MH4-Sword and Shield Render 013.png|center|110x110px]] |
||
| + | | width="10px" | |
||
| + | | valign="center" | {{MHGenWL|Usurper's Firebolt}}<br />{{L}} {{MHGenWL|Despot's Crookbolt}} |
||
| + | |} |
||
| + | | valign="top" | |
||
| + | {| width="100%" valign="top" |
||
| + | | colspan="3" style="font-size:11pt; text-align:left;" | '''Dual Blades''' |
||
| + | |- |
||
| + | | height="110px" width="110px" valign="center" | [[File:MH4-Dual Blades Render 030.png|center|110x110px]] |
||
| + | | width="10px" | |
||
| + | | valign="center" | {{MHGenWL|Usurper's Fulgur}}<br />{{L}} {{MHGenWL|Despot's Blitz}} |
||
| + | |} |
||
| + | |- |
||
| + | | valign="top" | |
||
| + | {| width="100%" valign="top" |
||
| + | | colspan="3" style="font-size:11pt; text-align:left;" | '''Hammer''' |
||
| + | |- |
||
| + | | height="110px" width="110px" valign="center" | [[File:MH4-Hammer Render 012.png|center|110x110px]] |
||
| + | | width="10px" | |
||
| + | | valign="center" | {{MHGenWL|Usurper's Thunder}}<br />{{L}} {{MHGenWL|Despot's Crackle}} |
||
| + | |} |
||
| + | | valign="top" | |
||
| + | {| width="100%" valign="top" |
||
| + | | colspan="3" style="font-size:11pt; text-align:left;" | '''Hunting Horn''' |
||
| + | |- |
||
| + | | height="110px" width="110px" valign="center" | [[File:MH4-Hunting Horn Render 010.png|center|110x110px]] |
||
| + | | width="10px" | |
||
| + | | valign="center" | {{MHGenWL|Usurper's Growl}}<br />{{L}} {{MHGenWL|Despot's Thunderclap}} |
||
| + | |} |
||
| + | |- |
||
| + | | valign="top" | |
||
| + | {| width="100%" valign="top" |
||
| + | | colspan="3" style="font-size:11pt; text-align:left;" | '''Lance''' |
||
| + | |- |
||
| + | | height="110px" width="110px" valign="center" | [[File:MH4-Lance Render 030.png|center|110x110px]] |
||
| + | | width="10px" | |
||
| + | | valign="center" | {{MHGenWL|Usurper's Coming}}<br />{{L}} {{MHGenWL|Despot's Cacophony}} |
||
| + | |} |
||
| + | | valign="top" | |
||
| + | {| width="100%" valign="top" |
||
| + | | colspan="3" style="font-size:11pt; text-align:left;" | '''Gunlance''' |
||
| + | |- |
||
| + | | height="110px" width="110px" valign="center" | [[File:MH4-Gunlance Render 027.png|center|110x110px]] |
||
| + | | width="10px" | |
||
| + | | valign="center" | {{MHGenWL|Usurper's Roar}}<br />{{L}} {{MHGenWL|Despot's Phlogiston}} |
||
| + | |} |
||
| + | |- |
||
| + | | valign="top" | |
||
| + | {| width="100%" valign="top" |
||
| + | | colspan="3" style="font-size:11pt; text-align:left;" | '''Switch Axe''' |
||
| + | |- |
||
| + | | height="110px" width="110px" valign="center" | [[File:MH4-Switch Axe Render 011.png|center|110x110px]] |
||
| + | | width="10px" | |
||
| + | | valign="center" | {{MHGenWL|Usurper's Downpour}}<br />{{L}} {{MHGenWL|Despot's Cloudburst}} |
||
| + | |} |
||
| + | | valign="top" | |
||
| + | {| width="100%" valign="top" |
||
| + | | colspan="3" style="font-size:11pt; text-align:left;" | '''Light Bowgun''' |
||
| + | |- |
||
| + | | height="110px" width="110px" valign="center" | [[File:MH4-Light Bowgun Render 007.png|center|110x110px]] |
||
| + | | width="10px" | |
||
| + | | valign="center" | {{MHGenWL|Usurper's Crime}}<br />{{L}} {{MHGenWL|Despot's Wildfire}} |
||
| + | |} |
||
| + | |- |
||
| + | | valign="top" | |
||
| + | {| width="100%" valign="top" |
||
| + | | colspan="3" style="font-size:11pt; text-align:left;" | '''Heavy Bowgun''' |
||
| + | |- |
||
| + | | height="110px" width="110px" valign="center" | [[File:Wiki.png|center|110x110px]] |
||
| + | | width="10px" | |
||
| + | | valign="center" | {{MHGenWL|Usurper's Tremor}}<br />{{L}} {{MHGenWL|Despot's Paroxysm}} |
||
| + | |} |
||
| + | | valign="top" | |
||
| + | {| width="100%" valign="top" |
||
| + | | colspan="3" style="font-size:11pt; text-align:left;" | '''Bow''' |
||
| + | |- |
||
| + | | height="110px" width="110px" valign="center" | [[File:MH4-Bow Render 021.png|center|110x110px]] |
||
| + | | width="10px" | |
||
| + | | valign="center" | {{MHGenWL|Usurper's Rumble}}<br />{{L}} {{MHGenWL|Despot's Earlybolt}} |
||
| + | |} |
||
| + | |} |
||
| + | |||
| + | {{-}} |
||
| + | |||
| + | ==Monster Hunter Generations Ultimate Weapons== |
||
| + | {| style="font-size:9.5pt;" align="center" width="100%" |
||
| + | | valign="top" | |
||
| + | {| width="100%" valign="top" |
||
| + | | colspan="3" style="font-size:11pt; text-align:left;" | '''Great Sword''' |
||
| + | |- |
||
| + | | height="110px" width="110px" valign="center" | [[File:MH4-Great Sword Render 014.png|center|110x110px]] |
||
| + | | width="10px" | |
||
| + | | valign="center" | {{MHGUWL|Usurper's Storm}}<br />{{L}} {{MHGUWL|Despot's Blackstorm}}<br />{{Indent}}{{L}} {{MHGUWL|Oppressor's Forger}} |
||
| + | |} |
||
| + | | valign="top" | |
||
| + | {| width="100%" valign="top" |
||
| + | | colspan="3" style="font-size:11pt; text-align:left;" | '''Long Sword''' |
||
| + | |- |
||
| + | | height="110px" width="110px" valign="center" | [[File:MH4-Long Sword Render 020.png|center|110x110px]] |
||
| + | | width="10px" | |
||
| + | | valign="center" | <br />{{MHGUWL|Usurper's Boltslicer}}<br />{{L}} {{MHGUWL|Despot's Boltbreaker}}<br />{{Indent}}{{Branch}} {{MHGUWL|Oppressor's Law}}<br />{{Indent}}{{I}} |
||
| + | |- |
||
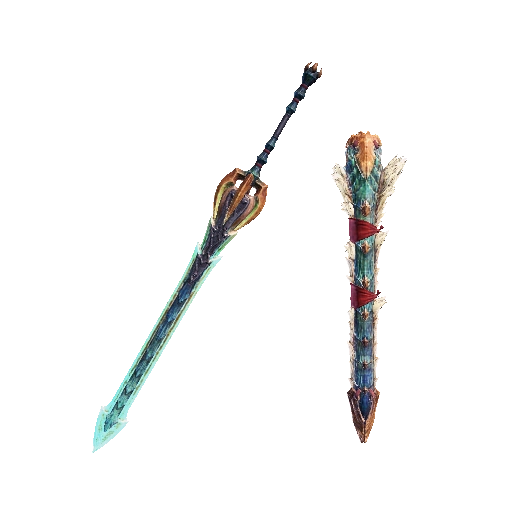
| + | | height="110px" width="110px" valign="center" | [[File:MHGU-Long Sword Render 024.png|center|110x110px]] |
||
| + | | width="10px" | |
||
| + | | valign="top" | {{Indent}}{{I}}<br />{{Indent}}{{L}} {{MHGUWL|Despot's Boltrunner}}<br />{{Indent}}{{Indent}}{{L}} {{MHGUWL|Oppressor's Abyss}}<br />{{Indent}}{{Indent}}{{Indent}}{{L}} {{MHGUWL|Orcus Nitorus}} |
||
| + | |} |
||
| + | |- |
||
| + | | valign="top" | |
||
| + | {| width="100%" valign="top" |
||
| + | | colspan="3" style="font-size:11pt; text-align:left;" | '''Sword and Shield''' |
||
| + | |- |
||
| + | | height="110px" width="110px" valign="center" | [[File:MH4-Sword and Shield Render 013.png|center|110x110px]] |
||
| + | | width="10px" | |
||
| + | | valign="center" | {{MHGUWL|Usurper's Firebolt}}<br />{{L}} {{MHGUWL|Despot's Crookbolt}}<br />{{Indent}}{{L}} {{MHGUWL|Oppressor's Bounty}} |
||
| + | |} |
||
| + | | valign="top" | |
||
| + | {| width="100%" valign="top" |
||
| + | | colspan="3" style="font-size:11pt; text-align:left;" | '''Dual Blades''' |
||
| + | |- |
||
| + | | height="110px" width="110px" valign="center" | [[File:MH4-Dual Blades Render 030.png|center|110x110px]] |
||
| + | | width="10px" | |
||
| + | | valign="center" | {{MHGUWL|Usurper's Fulgur}}<br />{{L}} {{MHGUWL|Despot's Blitz}}<br />{{Indent}}{{L}} {{MHGUWL|Oppressor's Miracle}} |
||
| + | |} |
||
| + | |- |
||
| + | | valign="top" | |
||
| + | {| width="100%" valign="top" |
||
| + | | colspan="3" style="font-size:11pt; text-align:left;" | '''Hammer''' |
||
| + | |- |
||
| + | | height="110px" width="110px" valign="center" | [[File:MH4-Hammer Render 012.png|center|110x110px]] |
||
| + | | width="10px" | |
||
| + | | valign="center" | {{MHGUWL|Usurper's Thunder}}<br />{{L}} {{MHGUWL|Despot's Crackle}}<br />{{Indent}}{{L}} {{MHGUWL|Oppressor's Sway}} |
||
| + | |} |
||
| + | | valign="top" | |
||
| + | {| width="100%" valign="top" |
||
| + | | colspan="3" style="font-size:11pt; text-align:left;" | '''Hunting Horn''' |
||
| + | |- |
||
| + | | height="110px" width="110px" valign="center" | [[File:MH4-Hunting Horn Render 010.png|center|110x110px]] |
||
| + | | width="10px" | |
||
| + | | valign="center" | {{MHGUWL|Usurper's Growl}}<br />{{L}} {{MHGUWL|Despot's Thunderclap}}<br />{{Indent}}{{L}} {{MHGUWL|Oppressor's Boon}} |
||
| + | |} |
||
| + | |- |
||
| + | | valign="top" | |
||
| + | {| width="100%" valign="top" |
||
| + | | colspan="3" style="font-size:11pt; text-align:left;" | '''Lance''' |
||
| + | |- |
||
| + | | height="110px" width="110px" valign="center" | [[File:MH4-Lance Render 030.png|center|110x110px]] |
||
| + | | width="10px" | |
||
| + | | valign="center" | {{MHGUWL|Usurper's Coming}}<br />{{L}} {{MHGUWL|Despot's Cacophony}}<br />{{Indent}}{{L}} {{MHGUWL|Oppressor's Genesis}} |
||
| + | |} |
||
| + | | valign="top" | |
||
| + | {| width="100%" valign="top" |
||
| + | | colspan="3" style="font-size:11pt; text-align:left;" | '''Gunlance''' |
||
| + | |- |
||
| + | | height="110px" width="110px" valign="center" | [[File:MH4-Gunlance Render 027.png|center|110x110px]] |
||
| + | | width="10px" | |
||
| + | | valign="center" | {{MHGUWL|Usurper's Roar}}<br />{{L}} {{MHGUWL|Despot's Phlogiston}}<br />{{Indent}}{{L}} {{MHGUWL|Oppressor's Skyfall}} |
||
| + | |} |
||
| + | |- |
||
| + | | valign="top" | |
||
| + | {| width="100%" valign="top" |
||
| + | | colspan="3" style="font-size:11pt; text-align:left;" | '''Switch Axe''' |
||
| + | |- |
||
| + | | height="110px" width="110px" valign="center" | [[File:MH4-Switch Axe Render 011.png|center|110x110px]] |
||
| + | | width="10px" | |
||
| + | | valign="center" | {{MHGUWL|Usurper's Downpour}}<br />{{L}} {{MHGUWL|Despot's Cloudburst}}<br />{{Indent}}{{L}} {{MHGUWL|Oppressor's Deluge}} |
||
| + | |} |
||
| + | | valign="top" | |
||
| + | {| width="100%" valign="top" |
||
| + | | colspan="3" style="font-size:11pt; text-align:left;" | '''Light Bowgun''' |
||
| + | |- |
||
| + | | height="110px" width="110px" valign="center" | [[File:MH4-Light Bowgun Render 007.png|center|110x110px]] |
||
| + | | width="10px" | |
||
| + | | valign="center" | <br />{{MHGUWL|Usurper's Crime}}<br />{{I}}{{L}} {{MHGUWL|Despot's Wildfire}}<br />{{I}}{{Indent}}{{L}} {{MHGUWL|Oppressor's Rift}}<br />{{I}} |
||
| + | |- |
||
| + | | height="110px" width="110px" valign="center" | [[File:MHGU-Light Bowgun Render 014.png|center|110x110px]] |
||
| + | | width="10px" | |
||
| + | | valign="top" | {{I}}<br />{{L}} {{MHGUWL|Leader's Thunder}}<br />{{Indent}}{{L}} {{MHGUWL|Despot's Wedge}}<br />{{Indent}}{{Indent}}{{L}} {{MHGUWL|Orcus Barqus}} |
||
| + | |} |
||
| + | |- |
||
| + | | valign="top" | |
||
| + | {| width="100%" valign="top" |
||
| + | | colspan="3" style="font-size:11pt; text-align:left;" | '''Heavy Bowgun''' |
||
| + | |- |
||
| + | | height="110px" width="110px" valign="center" | [[File:MHGU-Heavy Bowgun Render 029.png|center|110x110px]] |
||
| + | | width="10px" | |
||
| + | | valign="center" | <br />{{MHGUWL|Usurper's Tremor}}<br />{{L}} {{MHGUWL|Despot's Paroxysm}}<br />{{Indent}}{{Branch}} {{MHGUWL|Oppressor's Making}}<br />{{Indent}}{{I}} |
||
| + | |- |
||
| + | | height="110px" width="110px" valign="center" | [[File:MH4-Heavy Bowgun Render 010.png|center|110x110px]] |
||
| + | | width="10px" | |
||
| + | | valign="top" | {{Indent}}{{I}}<br />{{Indent}}{{L}} {{MHGUWL|Loyal Thunder}}<br />{{Indent}}{{Indent}}{{L}} {{MHGUWL|Oppressor's Wedge}}<br />{{Indent}}{{Indent}}{{Indent}}{{L}} {{MHGUWL|Orcus Quarcus}} |
||
| + | |} |
||
| + | | valign="top" | |
||
| + | {| width="100%" valign="top" |
||
| + | | colspan="3" style="font-size:11pt; text-align:left;" | '''Bow''' |
||
| + | |- |
||
| + | | height="110px" width="110px" valign="center" | [[File:MH4-Bow Render 021.png|center|110x110px]] |
||
| + | | width="10px" | |
||
| + | | valign="center" | <br />{{MHGUWL|Usurper's Rumble}}<br />{{L}} {{MHGUWL|Despot's Earlybolt}}<br />{{Indent}}{{Branch}} {{MHGUWL|Oppressor's Answer}}<br />{{Indent}}{{I}} |
||
| + | |- |
||
| + | | height="110px" width="110px" valign="center" | [[File:MHGU-Bow Render 003.png|center|110x110px]] |
||
| + | | width="10px" | |
||
| + | | valign="top" | {{Indent}}{{I}}<br />{{Indent}}{{L}} {{MHGUWL|Despot's Shock}}<br />{{Indent}}{{Indent}}{{L}} {{MHGUWL|Oppressor's Providence}}<br />{{Indent}}{{Indent}}{{Indent}}{{L}} {{MHGUWL|Orcus Sagittus}} |
||
| + | |} |
||
| + | |} |
||
| + | |||
| + | {{-}} |
||
| + | |||
| + | ==Monster Hunter World: Iceborne== |
||
| + | |||
| + | <div style="float:left; width:50%"> |
||
| + | <div align="center" style="float:left; width:40%"> |
||
| + | '''Great Sword''' |
||
| + | </div>{{-}} |
||
| + | |||
| + | <div style="float:left; width:40%"> |
||
| + | [[File:MHWI-Great Sword Render 003.png|center|110x110px]] |
||
| + | </div> |
||
| + | <div style="float:left; width:60%"> |
||
| + | {{MHWIWL|Severing Bolt I}}<br />{{L}} {{MHWIWL|Severing Bolt II}} |
||
| + | </div> |
||
| + | </div> |
||
| + | |||
| + | <div style="float:left; width:50%"> |
||
| + | <div align="center" style="float:left; width:40%"> |
||
| + | '''Long Sword''' |
||
| + | </div>{{-}} |
||
| + | |||
| + | <div style="float:left; width:40%"> |
||
| + | [[File:MHWI-Long Sword Render 002.png|center|110x110px]] |
||
| + | </div> |
||
| + | <div style="float:left; width:60%"> |
||
| + | {{MHWIWL|Usurper's Boltslicer}}<br />{{L}} {{MHWIWL|Usurper's Boltslicer+}}<br />{{Indent}}{{L}} {{MHWIWL|Despot's Boltbreaker}} |
||
| + | </div> |
||
| + | </div> |
||
| + | |||
| + | {{-}} |
||
| + | |||
| + | <div style="float:left; width:50%"> |
||
| + | <div align="center" style="float:left; width:40%"> |
||
| + | '''Sword and Shield''' |
||
| + | </div>{{-}} |
||
| + | |||
| + | <div style="float:left; width:40%"> |
||
| + | [[File:MHWI-Sword and Shield Render 022.png|center|110x110px]] |
||
| + | </div> |
||
| + | <div style="float:left; width:60%"> |
||
| + | {{MHWIWL|Usurper's Firebolt}}<br />{{L}} {{MHWIWL|Usurper's Firebolt+}}<br />{{Indent}}{{L}} {{MHWIWL|Despot's Crookbolt}} |
||
| + | </div> |
||
| + | </div> |
||
| + | |||
| + | <div style="float:left; width:50%"> |
||
| + | <div align="center" style="float:left; width:40%"> |
||
| + | '''Dual Blades''' |
||
| + | </div>{{-}} |
||
| + | |||
| + | <div style="float:left; width:40%"> |
||
| + | [[File:MHWI-Dual Blades Render 002.png|center|110x110px]] |
||
| + | </div> |
||
| + | <div style="float:left; width:60%"> |
||
| + | {{MHWIWL|Usurper's Fulgur}}<br />{{L}} {{MHWIWL|Usurper's Fulgur+}}<br />{{Indent}}{{L}} {{MHWIWL|Despot's Blitz}} |
||
| + | </div> |
||
| + | </div> |
||
| + | |||
| + | {{-}} |
||
| + | |||
| + | <div style="float:left; width:50%"> |
||
| + | <div align="center" style="float:left; width:40%"> |
||
| + | '''Hammer''' |
||
| + | </div>{{-}} |
||
| + | |||
| + | <div style="float:left; width:40%"> |
||
| + | [[File:MHWI-Hammer Render 009.png|center|110x110px]] |
||
| + | </div> |
||
| + | <div style="float:left; width:60%"> |
||
| + | {{MHWIWL|Usurper's Thunder}}<br />{{L}} {{MHWIWL|Usurper's Thunder+}}<br />{{Indent}}{{L}} {{MHWIWL|Despot's Crackle}} |
||
| + | </div> |
||
| + | </div> |
||
| + | |||
| + | <div style="float:left; width:50%"> |
||
| + | <div align="center" style="float:left; width:40%"> |
||
| + | '''Hunting Horn''' |
||
| + | </div>{{-}} |
||
| + | |||
| + | <div style="float:left; width:40%"> |
||
| + | [[File:MHWI-Hunting Horn Render 003.png|center|110x110px]] |
||
| + | </div> |
||
| + | <div style="float:left; width:60%"> |
||
| + | {{MHWIWL|Usurper's Growl}}<br />{{L}} {{MHWIWL|Usurper's Growl+}}<br />{{Indent}}{{L}} {{MHWIWL|Despot's Thunderclap}} |
||
| + | </div> |
||
| + | </div> |
||
| + | |||
| + | {{-}} |
||
| + | |||
| + | <div style="float:left; width:50%"> |
||
| + | <div align="center" style="float:left; width:40%"> |
||
| + | '''Lance''' |
||
| + | </div>{{-}} |
||
| + | |||
| + | <div style="float:left; width:40%"> |
||
| + | [[File:MHWI-Lance Render 010.png|center|110x110px]] |
||
| + | </div> |
||
| + | <div style="float:left; width:60%"> |
||
| + | {{MHWIWL|Thunderpierce I}}<br />{{L}} {{MHWIWL|Thunderpierce II}} |
||
| + | </div> |
||
| + | </div> |
||
| + | |||
| + | <div style="float:left; width:50%"> |
||
| + | <div align="center" style="float:left; width:40%"> |
||
| + | '''Gunlance''' |
||
| + | </div>{{-}} |
||
| + | |||
| + | <div style="float:left; width:40%"> |
||
| + | [[File:MHWI-Gunlance Render 024.png|center|110x110px]] |
||
| + | </div> |
||
| + | <div style="float:left; width:60%"> |
||
| + | {{MHWIWL|Usurper's Roar}}<br />{{L}} {{MHWIWL|Usurper's Roar+}}<br />{{Indent}}{{L}} {{MHWIWL|Despot's Phlogiston}} |
||
| + | </div> |
||
| + | </div> |
||
| + | |||
| + | {{-}} |
||
| + | |||
| + | <div style="float:left; width:50%"> |
||
| + | <div align="center" style="float:left; width:40%"> |
||
| + | '''Switch Axe''' |
||
| + | </div>{{-}} |
||
| + | |||
| + | <div style="float:left; width:40%"> |
||
| + | [[File:MHWI-Switch Axe Render 005.png|center|110x110px]] |
||
| + | </div> |
||
| + | <div style="float:left; width:60%"> |
||
| + | {{MHWIWL|Thundercleave I}}<br />{{L}} {{MHWIWL|Thundercleave II}} |
||
| + | </div> |
||
| + | </div> |
||
| + | |||
| + | <div style="float:left; width:50%"> |
||
| + | <div align="center" style="float:left; width:40%"> |
||
| + | '''Charge Blade''' |
||
| + | </div>{{-}} |
||
| + | |||
| + | <div style="float:left; width:40%"> |
||
| + | [[File:MHWI-Charge Blade Render 002.png|center|110x110px]] |
||
| + | </div> |
||
| + | <div style="float:left; width:60%"> |
||
| + | {{MHWIWL|Usurper's Lightning}}<br />{{L}} {{MHWIWL|Usurper's Lightning+}}<br />{{Indent}}{{L}} {{MHWIWL|Despot's Thundergale}} |
||
| + | </div> |
||
| + | </div> |
||
| + | |||
| + | {{-}} |
||
| + | |||
| + | <div style="float:left; width:50%"> |
||
| + | <div align="center" style="float:left; width:40%"> |
||
| + | '''Insect Glaive''' |
||
| + | </div>{{-}} |
||
| + | |||
| + | <div style="float:left; width:40%"> |
||
| + | [[File:MHWI-Insect Glaive Render 002.png|center|110x110px]] |
||
| + | </div> |
||
| + | <div style="float:left; width:60%"> |
||
| + | {{MHWIWL|Royal Bolt Scepter}}<br />{{L}} {{MHWIWL|Royal Bolt Scepter+}}<br />{{Indent}}{{L}} {{MHWIWL|Despot's Twinbolt}} |
||
| + | </div> |
||
| + | </div> |
||
| + | |||
| + | <div style="float:left; width:50%"> |
||
| + | <div align="center" style="float:left; width:40%"> |
||
| + | '''Light Bowgun''' |
||
| + | </div>{{-}} |
||
| + | |||
| + | <div style="float:left; width:40%"> |
||
| + | [[File:MHWI-Light Bowgun Render 013.png|center|110x110px]] |
||
| + | </div> |
||
| + | <div style="float:left; width:60%"> |
||
| + | {{MHWIWL|Usurper's Crime}}<br />{{L}} {{MHWIWL|Usurper's Crime+}}<br />{{Indent}}{{L}} {{MHWIWL|Despot's Wildfire}} |
||
| + | </div> |
||
| + | </div> |
||
| + | |||
| + | {{-}} |
||
| + | |||
| + | <div style="float:left; width:50%"> |
||
| + | <div align="center" style="float:left; width:40%"> |
||
| + | '''Heavy Bowgun''' |
||
| + | </div>{{-}} |
||
| + | |||
| + | <div style="float:left; width:40%"> |
||
| + | [[File:MHWI-Heavy Bowgun Render 008.png|center|110x110px]] |
||
| + | </div> |
||
| + | <div style="float:left; width:60%"> |
||
| + | {{MHWIWL|Mightning}}<br />{{L}} {{MHWIWL|Mightning+}}<br />{{Indent}}{{L}} {{MHWIWL|Loyal Thunder}} |
||
| + | </div> |
||
| + | </div> |
||
| + | |||
| + | <div style="float:left; width:50%"> |
||
| + | <div align="center" style="float:left; width:40%"> |
||
| + | '''Bow''' |
||
| + | </div>{{-}} |
||
| + | |||
| + | <div style="float:left; width:40%"> |
||
| + | [[File:MHWI-Bow Render 002.png|center|110x110px]] |
||
| + | </div> |
||
| + | <div style="float:left; width:60%"> |
||
| + | {{MHWIWL|Usurper's Rumble}}<br />{{L}} {{MHWIWL|Usurper's Rumble+}}<br />{{Indent}}{{L}} {{MHWIWL|Despot's Earlybolt}} |
||
| + | </div> |
||
| + | </div> |
||
| + | |||
| + | {{-}} |
||
| + | |||
| + | ==Monster Hunter Online Weapons== |
||
| + | <div style="float:left; width:50%"> |
||
| + | <div align="center" style="float:left; width:40%"> |
||
| + | '''Great Sword''' |
||
| + | </div>{{-}} |
||
| + | |||
| + | <div style="float:left; width:40%"> |
||
| + | [[File:MHO-Great Sword_Render_019.png|center|110x110px]] |
||
| + | </div> |
||
| + | <div style="float:left; width:60%"> |
||
| + | [[Zinogre Great Sword I (MHO)|Zinogre Great Sword I]]<br />{{L}} [[Zinogre Great Sword II (MHO)|Zinogre Great Sword II]]<br />{{Indent}}{{L}} [[Zinogre Great Sword III (MHO)|Zinogre Great Sword III]] |
||
| + | </div> |
||
| + | </div> |
||
| + | |||
| + | <div style="float:left; width:50%"> |
||
| + | <div align="center" style="float:left; width:40%"> |
||
| + | '''Long Sword''' |
||
| + | </div>{{-}} |
||
| + | |||
| + | <div style="float:left; width:40%"> |
||
| + | [[File:MHO-Long Sword_Render_019.png|center|110x110px]] |
||
| + | </div> |
||
| + | <div style="float:left; width:60%"> |
||
| + | [[Zinogre Long Sword I (MHO)|Zinogre Long Sword I]]<br />{{L}} [[Zinogre Long Sword II (MHO)|Zinogre Long Sword II]]<br />{{Indent}}{{L}} [[Zinogre Long Sword III (MHO)|Zinogre Long Sword III]] |
||
| + | </div> |
||
| + | </div> |
||
| + | |||
| + | <div style="float:left; width:100%"> |
||
| + | <div align="center" style="float:left; width:20%"> |
||
| + | '''Sword and Shield''' |
||
| + | </div>{{-}} |
||
| + | |||
| + | <div style="float:left; width:20%"> |
||
| + | [[File:MHO-Sword and Shield_Render_019.png|center|110x110px]] |
||
| + | </div> |
||
| + | <div style="float:left; width:80%"> |
||
| + | [[Zinogre Sword and Shield I (MHO)|Zinogre Sword and Shield I]]<br />{{L}} [[Zinogre Sword and Shield II (MHO)|Zinogre Sword and Shield II]]<br />{{Indent}}{{L}} [[Zinogre Sword and Shield III (MHO)|Zinogre Sword and Shield III]] |
||
| + | </div> |
||
| + | </div> |
||
| + | |||
| + | <div style="float:left; width:50%"> |
||
| + | <div align="center" style="float:left; width:40%"> |
||
| + | '''Dual Blades''' |
||
| + | </div>{{-}} |
||
| + | |||
| + | <div style="float:left; width:40%"> |
||
| + | [[File:MHO-Dual Blades_Render_019.png|center|110x110px]] |
||
| + | </div> |
||
| + | <div style="float:left; width:60%"> |
||
| + | [[Zinogre Dual Blades I (MHO)|Zinogre Dual Blades I]]<br />{{L}} [[Zinogre Dual Blades II (MHO)|Zinogre Dual Blades II]]<br />{{Indent}}{{L}} [[Zinogre Dual Blades III (MHO)|Zinogre Dual Blades III]] |
||
| + | </div> |
||
| + | </div> |
||
| + | |||
| + | <div style="float:left; width:50%"> |
||
| + | <div align="center" style="float:left; width:40%"> |
||
| + | '''Hammer''' |
||
| + | </div>{{-}} |
||
| + | |||
| + | <div style="float:left; width:40%"> |
||
| + | [[File:MHO-Hammer_Render_019.png|center|110x110px]] |
||
| + | </div> |
||
| + | <div style="float:left; width:60%"> |
||
| + | [[Zinogre Hammer I (MHO)|Zinogre Hammer I]]<br />{{L}} [[Zinogre Hammer II (MHO)|Zinogre Hammer II]]<br />{{Indent}}{{L}} [[Zinogre Hammer III (MHO)|Zinogre Hammer III]] |
||
| + | </div> |
||
| + | </div> |
||
| + | |||
| + | <div style="float:left; width:50%"> |
||
| + | <div align="center" style="float:left; width:40%"> |
||
| + | '''Hunting Horn''' |
||
| + | </div>{{-}} |
||
| + | |||
| + | <div style="float:left; width:40%"> |
||
| + | [[File:MHO-Hunting Horn_Render_019.png|center|110x110px]] |
||
| + | </div> |
||
| + | <div style="float:left; width:60%"> |
||
| + | [[Zinogre Hunting Horn I (MHO)|Zinogre Hunting Horn I]]<br />{{L}} [[Zinogre Hunting Horn II (MHO)|Zinogre Hunting Horn II]]<br />{{Indent}}{{L}} [[Zinogre Hunting Horn III (MHO)|Zinogre Hunting Horn III]] |
||
| + | </div> |
||
| + | </div> |
||
| + | |||
| + | <div style="float:left; width:50%"> |
||
| + | <div align="center" style="float:left; width:40%"> |
||
| + | '''Lance''' |
||
| + | </div>{{-}} |
||
| + | |||
| + | <div style="float:left; width:40%"> |
||
| + | [[File:MHO-Lance_Render_019.png|center|110x110px]] |
||
| + | </div> |
||
| + | <div style="float:left; width:60%"> |
||
| + | [[Zinogre Lance I (MHO)|Zinogre Lance I]]<br />{{L}} [[Zinogre Lance II (MHO)|Zinogre Lance II]]<br />{{Indent}}{{L}} [[Zinogre Lance III (MHO)|Zinogre Lance III]] |
||
| + | </div> |
||
| + | </div> |
||
| + | |||
| + | <div style="float:left; width:50%"> |
||
| + | <div align="center" style="float:left; width:40%"> |
||
| + | '''Gunlance''' |
||
| + | </div>{{-}} |
||
| + | |||
| + | <div style="float:left; width:40%"> |
||
| + | [[File:MHO-Gunlance_Render_019.png|center|110x110px]] |
||
| + | </div> |
||
| + | <div style="float:left; width:60%"> |
||
| + | [[Zinogre Gunlance I (MHO)|Zinogre Gunlance I]]<br />{{L}} [[Zinogre Gunlance II (MHO)|Zinogre Gunlance II]]<br />{{Indent}}{{L}} [[Zinogre Gunlance III (MHO)|Zinogre Gunlance III]] |
||
| + | </div> |
||
| + | </div> |
||
| + | |||
| + | <div style="float:left; width:50%"> |
||
| + | <div align="center" style="float:left; width:40%"> |
||
| + | '''Switch Axe''' |
||
| + | </div>{{-}} |
||
| + | |||
| + | <div style="float:left; width:40%"> |
||
| + | [[File:MHO-Switch Axe_Render_019.png|center|110x110px]] |
||
| + | </div> |
||
| + | <div style="float:left; width:60%"> |
||
| + | [[Zinogre Switch Axe I (MHO)|Zinogre Switch Axe I]]<br />{{L}} [[Zinogre Switch Axe II (MHO)|Zinogre Switch Axe II]]<br />{{Indent}}{{L}} [[Zinogre Switch Axe III (MHO)|Zinogre Switch Axe III]] |
||
| + | </div> |
||
| + | </div> |
||
| + | |||
| + | <div style="float:left; width:50%"> |
||
| + | <div align="center" style="float:left; width:40%"> |
||
| + | '''Bowgun''' |
||
| + | </div>{{-}} |
||
| + | |||
| + | <div style="float:left; width:40%"> |
||
| + | [[File:MHO-Bowgun_Render_019.png|center|110x110px]] |
||
| + | </div> |
||
| + | <div style="float:left; width:60%"> |
||
| + | [[Zinogre Bowgun I (MHO)|Zinogre Bowgun I]]<br />{{L}} [[Zinogre Bowgun II (MHO)|Zinogre Bowgun II]]<br />{{Indent}}{{L}} [[Zinogre Bowgun III (MHO)|Zinogre Bowgun III]] |
||
| + | </div> |
||
| + | </div> |
||
| + | |||
| + | <div style="float:left; width:50%"> |
||
| + | <div align="center" style="float:left; width:40%"> |
||
| + | '''Bow''' |
||
| + | </div>{{-}} |
||
| + | |||
| + | <div style="float:left; width:40%"> |
||
| + | [[File:MHO-Bow_Render_019.png|center|110x110px]] |
||
| + | </div> |
||
| + | <div style="float:left; width:60%"> |
||
| + | [[Zinogre Bow I (MHO)|Zinogre Bow I]]<br />{{L}} [[Zinogre Bow II (MHO)|Zinogre Bow II]]<br />{{Indent}}{{L}} [[Zinogre Bow III (MHO)|Zinogre Bow III]] |
||
| + | </div> |
||
| + | </div> |
||
| + | |||
| + | {{-}} |
||
| + | |||
==Weapons Gallery== |
==Weapons Gallery== |
||
<gallery type="slideshow" widths="500" position="center" hideaddbutton=true> |
<gallery type="slideshow" widths="500" position="center" hideaddbutton=true> |
||
File:MH4-Great Sword Render 014.png |
File:MH4-Great Sword Render 014.png |
||
File:FrontierGen-Great Sword 105 Render 001.png |
File:FrontierGen-Great Sword 105 Render 001.png |
||
| + | File:MHO-Great Sword_Render_019.png |
||
File:MH4-Long Sword Render 020.png |
File:MH4-Long Sword Render 020.png |
||
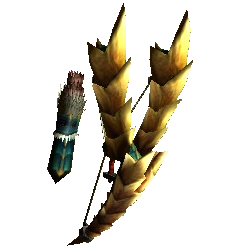
| + | File:MHGU-Long Sword Render 024.png |
||
| + | File:MHO-Long Sword_Render_019.png |
||
File:MH4-Sword and Shield Render 013.png |
File:MH4-Sword and Shield Render 013.png |
||
| + | File:MHO-Sword and Shield_Render_019.png |
||
File:MH4-Dual Blades Render 030.png |
File:MH4-Dual Blades Render 030.png |
||
File:MH4-Dual Blades Render 032.png |
File:MH4-Dual Blades Render 032.png |
||
| + | File:MHO-Dual Blades_Render_019.png |
||
File:MH4-Hammer Render 012.png |
File:MH4-Hammer Render 012.png |
||
File:FrontierGen-Hammer 096 Render 001.png |
File:FrontierGen-Hammer 096 Render 001.png |
||
| + | File:MHO-Hammer_Render_019.png |
||
File:MH4-Hunting Horn Render 010.png |
File:MH4-Hunting Horn Render 010.png |
||
| + | File:MHO-Hunting Horn_Render_019.png |
||
File:MH4-Lance Render 030.png |
File:MH4-Lance Render 030.png |
||
| + | File:MHO-Lance_Render_019.png |
||
File:MH4-Gunlance Render 027.png |
File:MH4-Gunlance Render 027.png |
||
| + | File:MHO-Gunlance_Render_019.png |
||
File:MH4-Switch Axe Render 011.png |
File:MH4-Switch Axe Render 011.png |
||
| + | File:MHO-Switch Axe_Render_019.png |
||
File:FrontierGen-Tonfa 031 Render 001.png |
File:FrontierGen-Tonfa 031 Render 001.png |
||
File:MH4-Light Bowgun Render 007.png |
File:MH4-Light Bowgun Render 007.png |
||
File:FrontierGen-Light Bowgun 058 Render 001.png |
File:FrontierGen-Light Bowgun 058 Render 001.png |
||
| + | File:MHGU-Heavy Bowgun Render 029.png |
||
File:MH4-Heavy Bowgun Render 010.png |
File:MH4-Heavy Bowgun Render 010.png |
||
| + | File:MHO-Bowgun_Render_019.png |
||
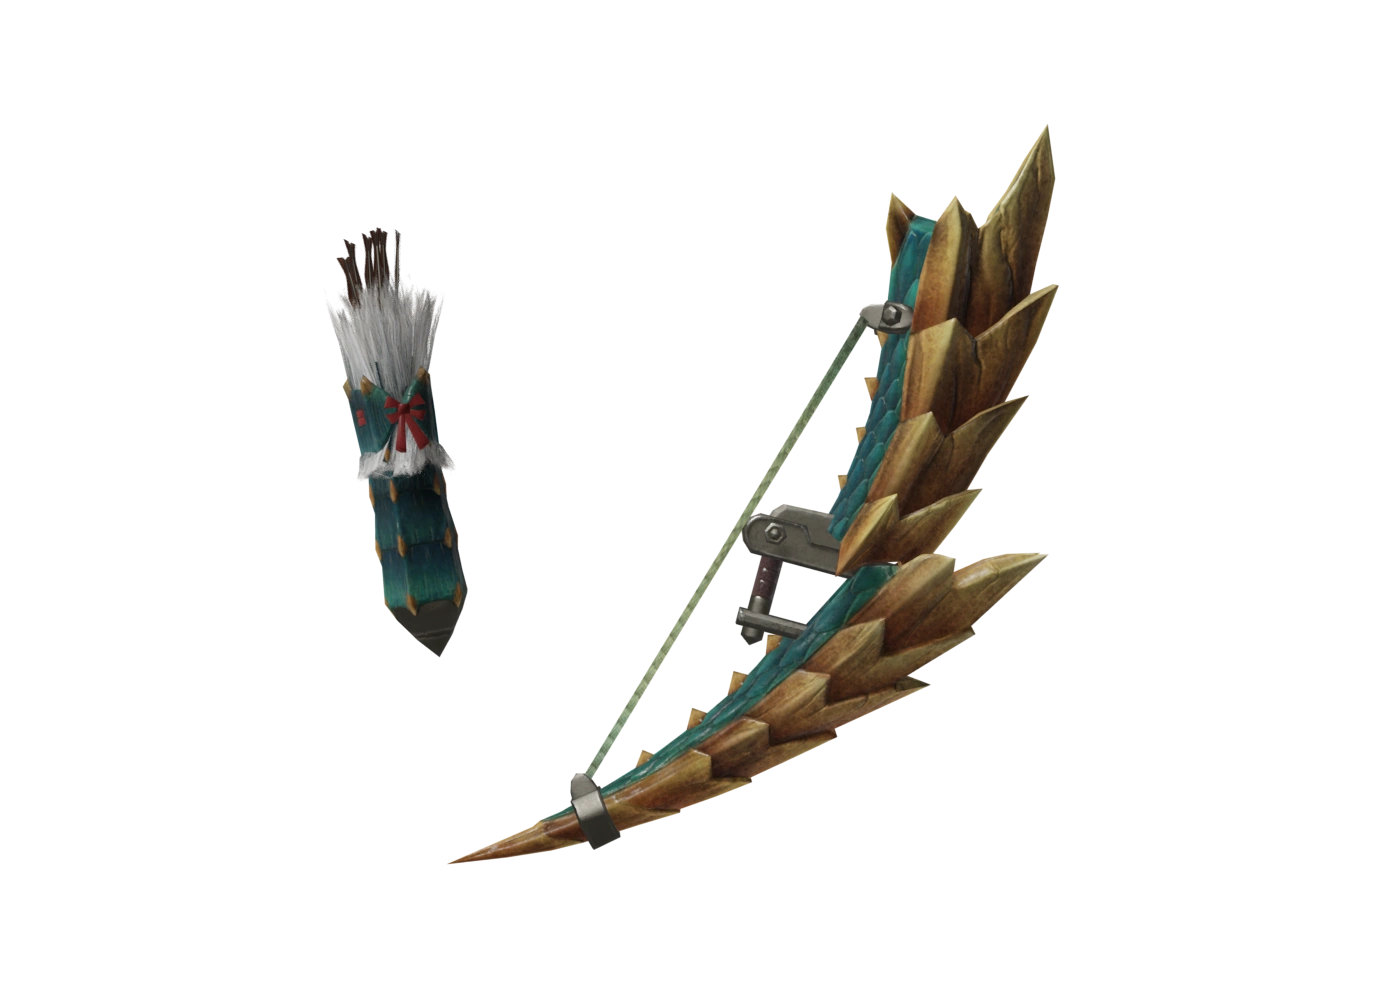
File:MH4-Bow Render 021.png |
File:MH4-Bow Render 021.png |
||
| + | File:MHGU-Bow Render 003.png |
||
| + | File:MHO-Bow_Render_019.png |
||
2010-542.png |
2010-542.png |
||
2010-543.png |
2010-543.png |
||
| Line 262: | Line 850: | ||
{{-}} |
{{-}} |
||
=Armor= |
=Armor= |
||
| + | ==Monster Hunter 3 Ultimate Armor== |
||
| + | ===Zinogre Armor / ジンオウシリーズ=== |
||
| + | {{Armor Set Equipment Format |
||
| + | |English Name = Zinogre Armor |
||
| + | |Japanese Name = ジンオウシリーズ |
||
| + | |Blademaster Image = wiki.png |
||
| + | |Gunner Image = wiki.png |
||
| + | |Blademaster Page = [[Zinogre Armor (Blademaster) (MH3U)|Blademaster]] |
||
| + | |Gunner Page = [[MH3U:_High_Rank_Gunner_Armor#Zinogre_Armor|Gunner]] |
||
| + | }} |
||
| + | |||
| + | ===Zinogre X Armor / ジンオウXシリーズ=== |
||
| + | {{Armor Set Equipment Format |
||
| + | |English Name = Zinogre X Armor |
||
| + | |Japanese Name = ジンオウXシリーズ |
||
| + | |Blademaster Image = wiki.png |
||
| + | |Gunner Image = wiki.png |
||
| + | |Blademaster Page = [[Zinogre X Armor (Blademaster) (MH3U)|Blademaster]] |
||
| + | |Gunner Page = [[Zinogre X Armor (Gunner) (MH3U)|Gunner]] |
||
| + | }}{{-}} |
||
| + | ==Monster Hunter 4 Ultimate Armor== |
||
| + | ===Zinogre Armor / ジンオウシリーズ=== |
||
| + | {{Armor Set Equipment Format |
||
| + | |English Name = Zinogre Armor |
||
| + | |Japanese Name = ジンオウシリーズ |
||
| + | |Blademaster Image = wiki.png |
||
| + | |Gunner Image = wiki.png |
||
| + | |Blademaster Page = [[Zinogre Armor (Blademaster) (MH4U)|Blademaster]] |
||
| + | |Gunner Page = [[Zinogre Armor (Gunner) (MH4U)|Gunner]] |
||
| + | }} |
||
| + | |||
| + | ===Zinogre S Armor / ジンオウSシリーズ=== |
||
| + | {{Armor Set Equipment Format |
||
| + | |English Name = Zinogre S Armor |
||
| + | |Japanese Name = ジンオウSシリーズ |
||
| + | |Blademaster Image = wiki.png |
||
| + | |Gunner Image = wiki.png |
||
| + | |Blademaster Page = [[Zinogre S Armor (Blademaster) (MH4U)|Blademaster]] |
||
| + | |Gunner Page = [[Zinogre S Armor (Gunner) (MH4U)|Gunner]] |
||
| + | }} |
||
| + | |||
| + | ===Zinogre X Armor / ジンオウXシリーズ=== |
||
| + | {{Armor Set Equipment Format |
||
| + | |English Name = Zinogre X Armor |
||
| + | |Japanese Name = ジンオウXシリーズ |
||
| + | |Blademaster Image = wiki.png |
||
| + | |Gunner Image = wiki.png |
||
| + | |Blademaster Page = [[Zinogre X Armor (Blademaster) (MH4U)|Blademaster]] |
||
| + | |Gunner Page = [[Zinogre X Armor (Gunner) (MH4U)|Gunner]] |
||
| + | }}{{-}} |
||
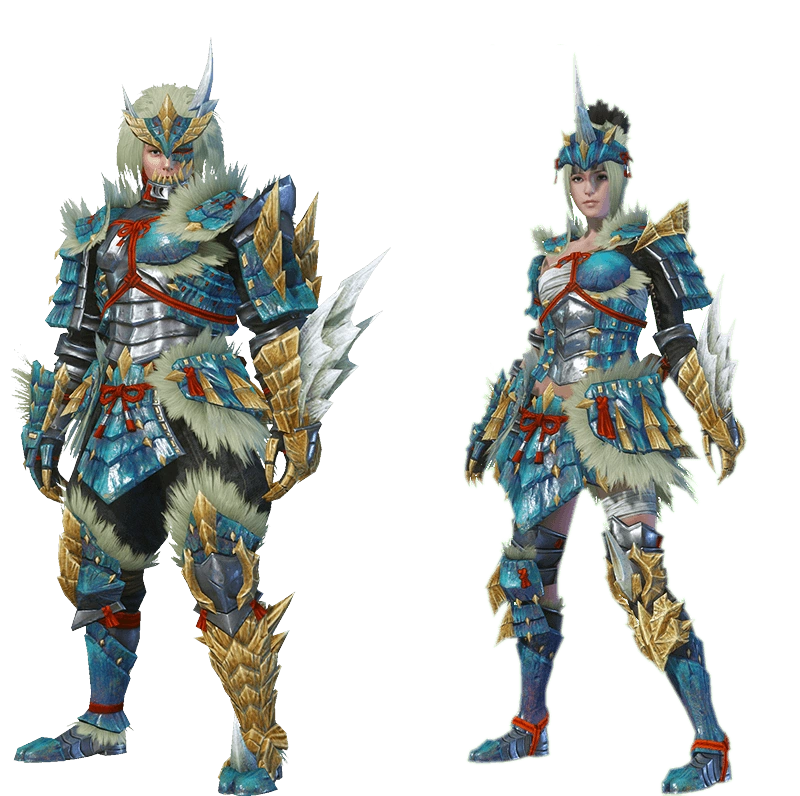
| + | ==Monster Hunter World: Iceborne Armor== |
||
| + | ===Master Rank=== |
||
| + | |||
| + | <div style="float:left; width:49%">{{ArmorCardExtra |
||
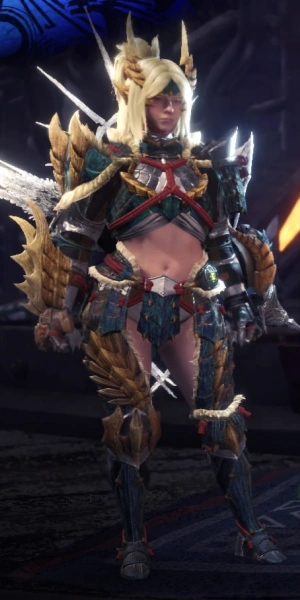
| + | |English Name = [[Zinogre α+ Armor (MHWI)|Zinogre α+ Armor]] |
||
| + | |Japanese Name = EXジンオウαシリーズ |
||
| + | |ImageMale = MHWI-ZinogreA+ArmorSet.png |
||
| + | |ImageFemale = MHWI-ZinogreA+ArmorSetF.png |
||
| + | |ImageSize = 260x260px |
||
| + | |ImageLink = Zinogre α+ Armor (MHWI) |
||
| + | |Skills = Zinogre Essence: Latent Power Secret (3)<br />Latent Power Lv 7<br />Thunder Attack Lv 5<br />Power Prolonger Lv 3<br />Recovery Speed Lv 2<br />Critical Boost Lv 1<br />Normal Shots Lv 1 |
||
| + | }}</div> |
||
| + | |||
| + | <div style="float:right; width:49%">{{ArmorCardExtra |
||
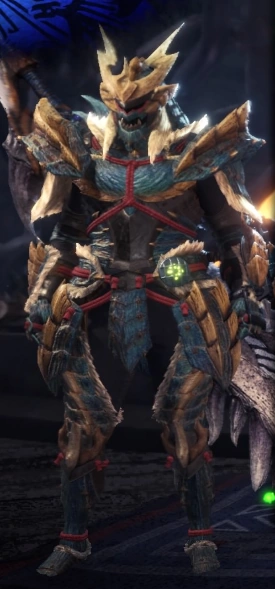
| + | |English Name = [[Zinogre β+ Armor (MHWI)|Zinogre β+ Armor]] |
||
| + | |Japanese Name = EXジンオウβシリーズ |
||
| + | |ImageMale = MHWI-ZinogreB+ArmorSet.png |
||
| + | |ImageFemale = MHWI-ZinogreB+ArmorSetF.png |
||
| + | |ImageSize = 260x260px |
||
| + | |ImageLink = Zinogre β+ Armor (MHWI) |
||
| + | |Skills = Zinogre Essence: Latent Power Secret (3)<br />Latent Power Lv 7<br />Power Prolonger Lv 2<br />Critical Boost Lv 1<br />Recovery Speed Lv 1<br />Thunder Attack Lv 1 |
||
| + | }}</div> |
||
| + | |||
| + | {{-}} |
||
==Monster Hunter Frontier G Armor== |
==Monster Hunter Frontier G Armor== |
||
===Zinogre Armor / ジンオウシリーズ=== |
===Zinogre Armor / ジンオウシリーズ=== |
||
| Line 270: | Line 932: | ||
|Gunner Image = FrontierGen-Zinogre Armor (Gunner) (Both) Render 2.png |
|Gunner Image = FrontierGen-Zinogre Armor (Gunner) (Both) Render 2.png |
||
|Blademaster Page = Blademaster<br /> |
|Blademaster Page = Blademaster<br /> |
||
| + | *Thunder Attack Up (Large) (雷属性攻撃強化【大】) |
||
| − | *Reckless Abandon +3 (見切り+3) |
||
| − | * |
+ | *Critical Eye +3 (見切り+3) |
| + | *Razor Sharp +1 (業物+1) |
||
*Attack Up (Medium) (攻撃力UP【中】) |
*Attack Up (Medium) (攻撃力UP【中】) |
||
| − | * |
+ | *Evasion +1 (回避性能+1) |
*Guts (根性) |
*Guts (根性) |
||
*Focus +1 (集中+1) |
*Focus +1 (集中+1) |
||
|Gunner Page = Gunner<br /> |
|Gunner Page = Gunner<br /> |
||
| + | *Thunder Attack Up (Large) (雷属性攻撃強化【大】) |
||
| − | *Reckless Abandon +3 (見切り+3) |
||
| + | *Critical Eye +3 (見切り+3) |
||
*Attack Up (Medium) (攻撃力UP【中】) |
*Attack Up (Medium) (攻撃力UP【中】) |
||
| − | * |
+ | *Reload Speed +2 (装填速度+2) |
| − | *Recoil |
+ | *Recoil Down +1 (反動軽減+1) |
*Auto-Reload (連射) |
*Auto-Reload (連射) |
||
}} |
}} |
||
| + | ==Monster Hunter Online Armor== |
||
| − | {{-}} |
||
| + | ===Zinogre Armor / (?)=== |
||
| + | {{Armor Set Equipment Format |
||
| + | |English Name = Zinogre Armor |
||
| + | |Japanese Name = (?) |
||
| + | |Blademaster Image = MHO-Zinogre Armor (Blademaster) Render 001.png |
||
| + | |Gunner Image = MHO-Zinogre Armor (Gunner) Render 001.png |
||
| + | |Blademaster Page = Blademaster<br/> |
||
| + | *Latent Power+1 |
||
| + | *Thunder Atk+2 |
||
| + | *Sharp |
||
| + | *Fanged Beast Killer |
||
| + | *<font color="red">Taunt</font> |
||
| + | |Gunner Page = Gunner<br/> |
||
| + | *Latent Power+1 |
||
| + | *Thunder Atk+2 |
||
| + | *Focus |
||
| + | *Fanged Beast Killer |
||
| + | *<font color="red">Taunt</font> |
||
| + | }} |
||
| + | |||
| + | ===Zinogre S Armor / (?)=== |
||
| + | {{Armor Set Equipment Format |
||
| + | |English Name = Zinogre S Armor |
||
| + | |Japanese Name = (?) |
||
| + | |Blademaster Image = MHO-Zinogre Armor (Blademaster) Render 001.png |
||
| + | |Gunner Image = MHO-Zinogre Armor (Gunner) Render 001.png |
||
| + | |Blademaster Page = Blademaster<br/> |
||
| + | *Latent Power+1 |
||
| + | *Thunder Atk+2 |
||
| + | *Sharpened Mind |
||
| + | *Fanged Beast Killer |
||
| + | |Gunner Page = Gunner<br/> |
||
| + | *Latent Power+1 |
||
| + | *Thunder Atk+2 |
||
| + | *Fleet Feet |
||
| + | *Fanged Beast Killer |
||
| + | }} |
||
| + | |||
| + | ===Zinogre R Armor / (?)=== |
||
| + | {{Armor Set Equipment Format |
||
| + | |English Name = Zinogre R Armor |
||
| + | |Japanese Name = (?) |
||
| + | |Blademaster Image = MHO-Zinogre Armor (Blademaster) Render 001.png |
||
| + | |Gunner Image = MHO-Zinogre Armor (Gunner) Render 001.png |
||
| + | |Blademaster Page = Blademaster<br/> |
||
| + | *Latent Power+1 |
||
| + | *Thunder Atk+2 |
||
| + | *Sharpened Mind |
||
| + | *Fanged Beast Killer |
||
| + | *Starving Wolf |
||
| + | |Gunner Page = Gunner<br/> |
||
| + | *Latent Power+1 |
||
| + | *Thunder Atk+2 |
||
| + | *Fleet Feet |
||
| + | *Fanged Beast Killer |
||
| + | *Starving Wolf |
||
| + | }}{{-}} |
||
==Armor Gallery== |
==Armor Gallery== |
||
<gallery type="slideshow" widths="500" position="center" hideaddbutton=true> |
<gallery type="slideshow" widths="500" position="center" hideaddbutton=true> |
||
| Line 291: | Line 1,012: | ||
File:PMHMT-Dual Blades Equipment Render 001.png |
File:PMHMT-Dual Blades Equipment Render 001.png |
||
File:PMHMT-Dual Blades Equipment Render 002.png |
File:PMHMT-Dual Blades Equipment Render 002.png |
||
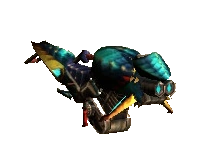
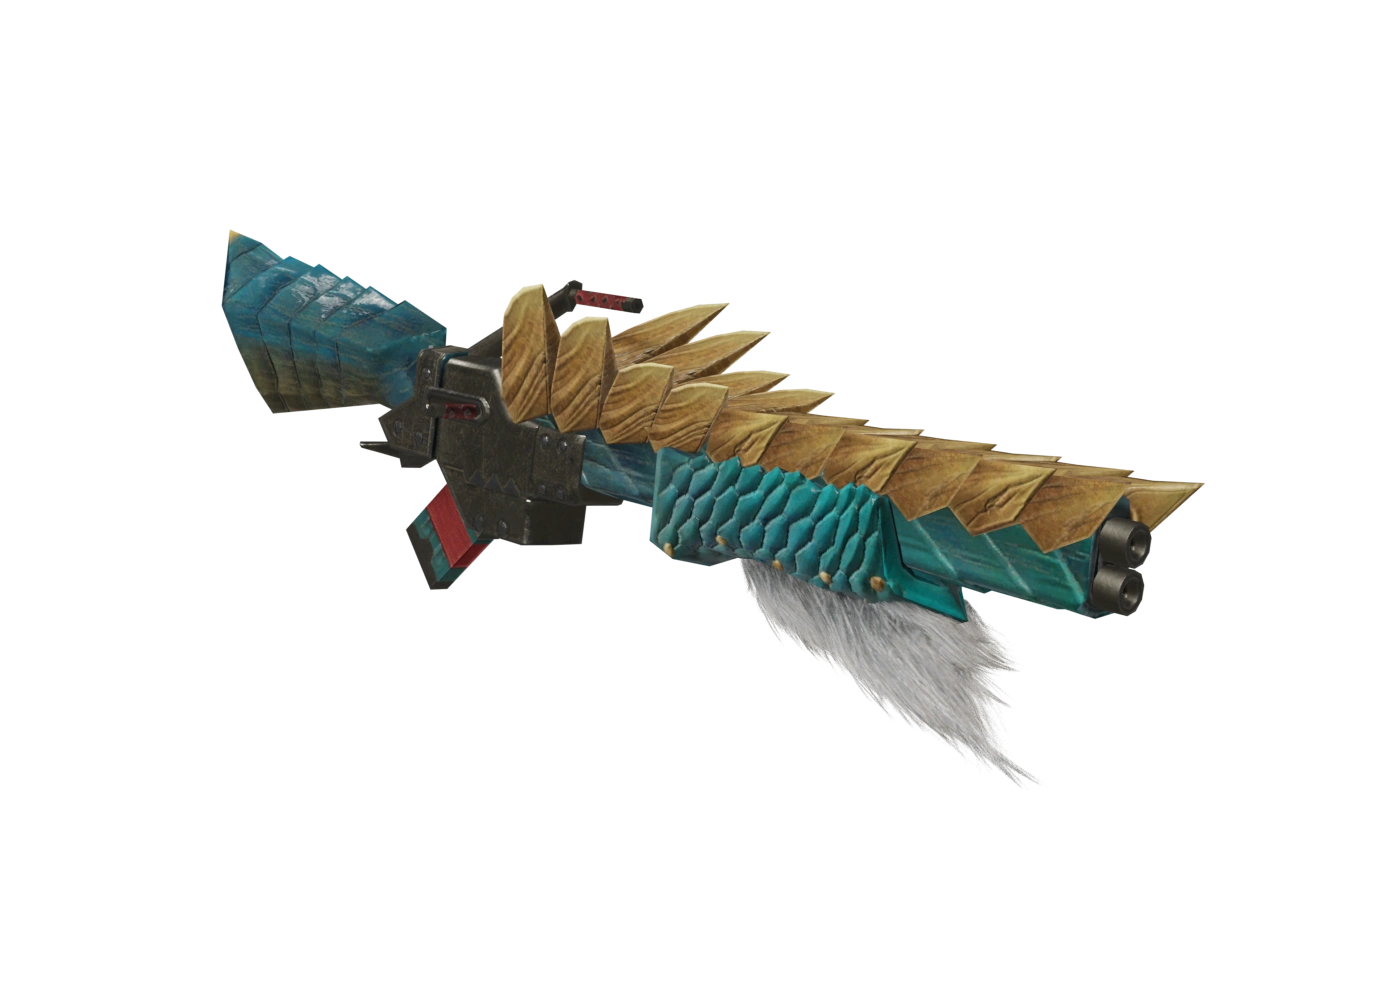
| − | File:MH3G-Gunlance Equipment Render 001. |
+ | File:MH3G-Gunlance Equipment Render 001.png |
Jinarmor.jpg |
Jinarmor.jpg |
||
Myhunter.jpg |
Myhunter.jpg |
||
Revision as of 19:15, 27 August 2020
Weapons
Monster Hunter 3 Ultimate Weapons
|
| ||||||||||||||||||
|
| ||||||||||||||||||
|
| ||||||||||||||||||
|
| ||||||||||||||||||
|
| ||||||||||||||||||
| |||||||||||||||||||

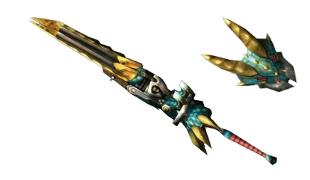
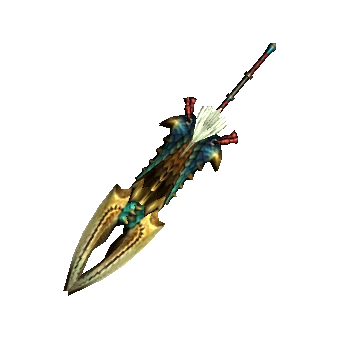
Monster Hunter 4 Ultimate Weapons
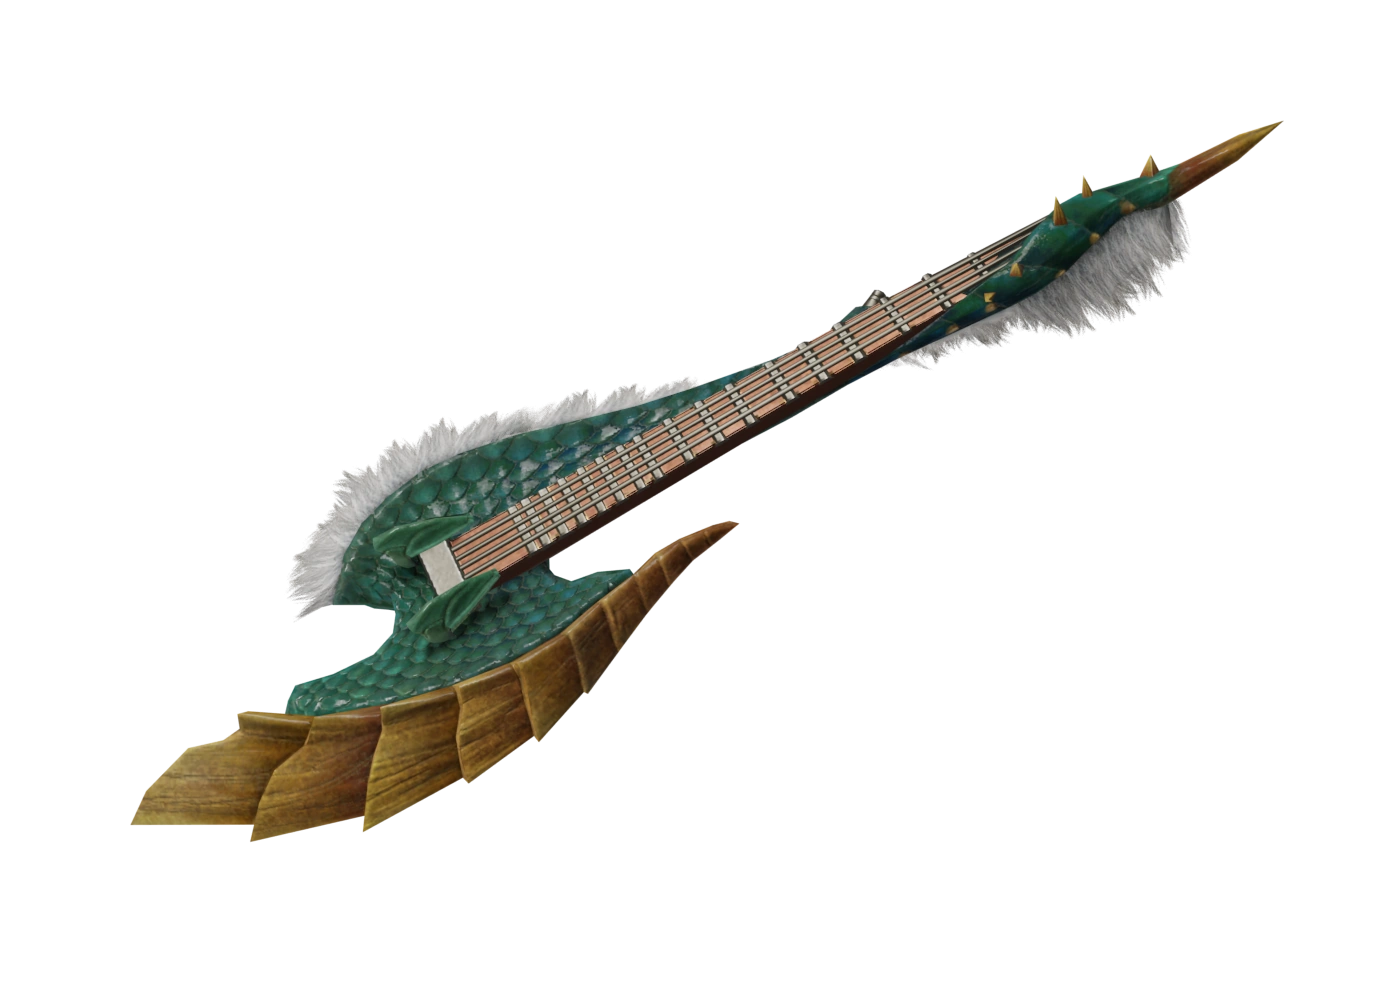
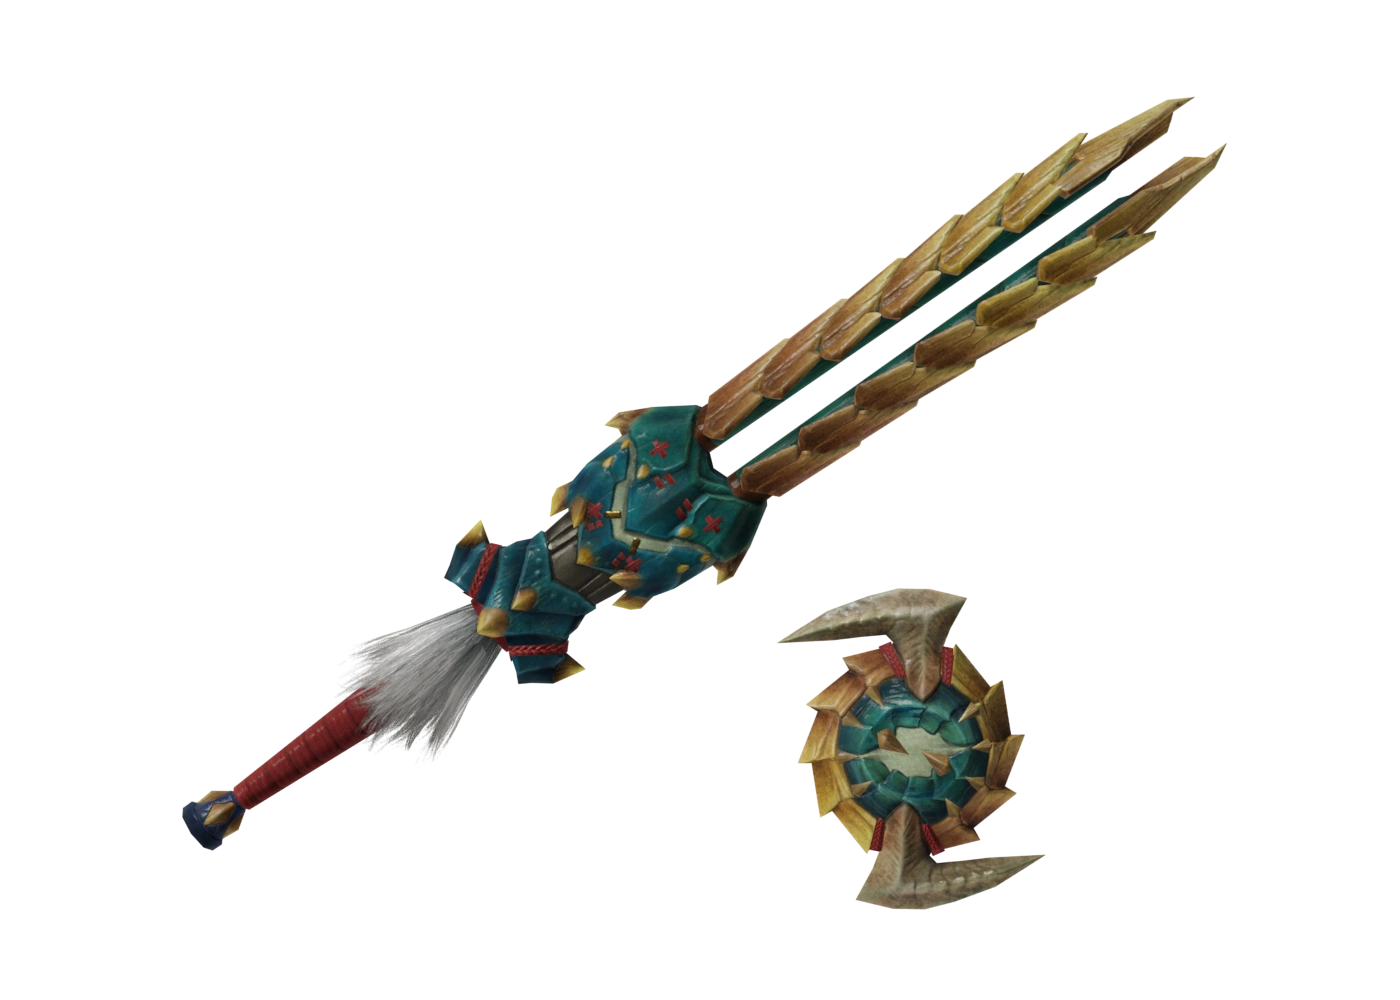
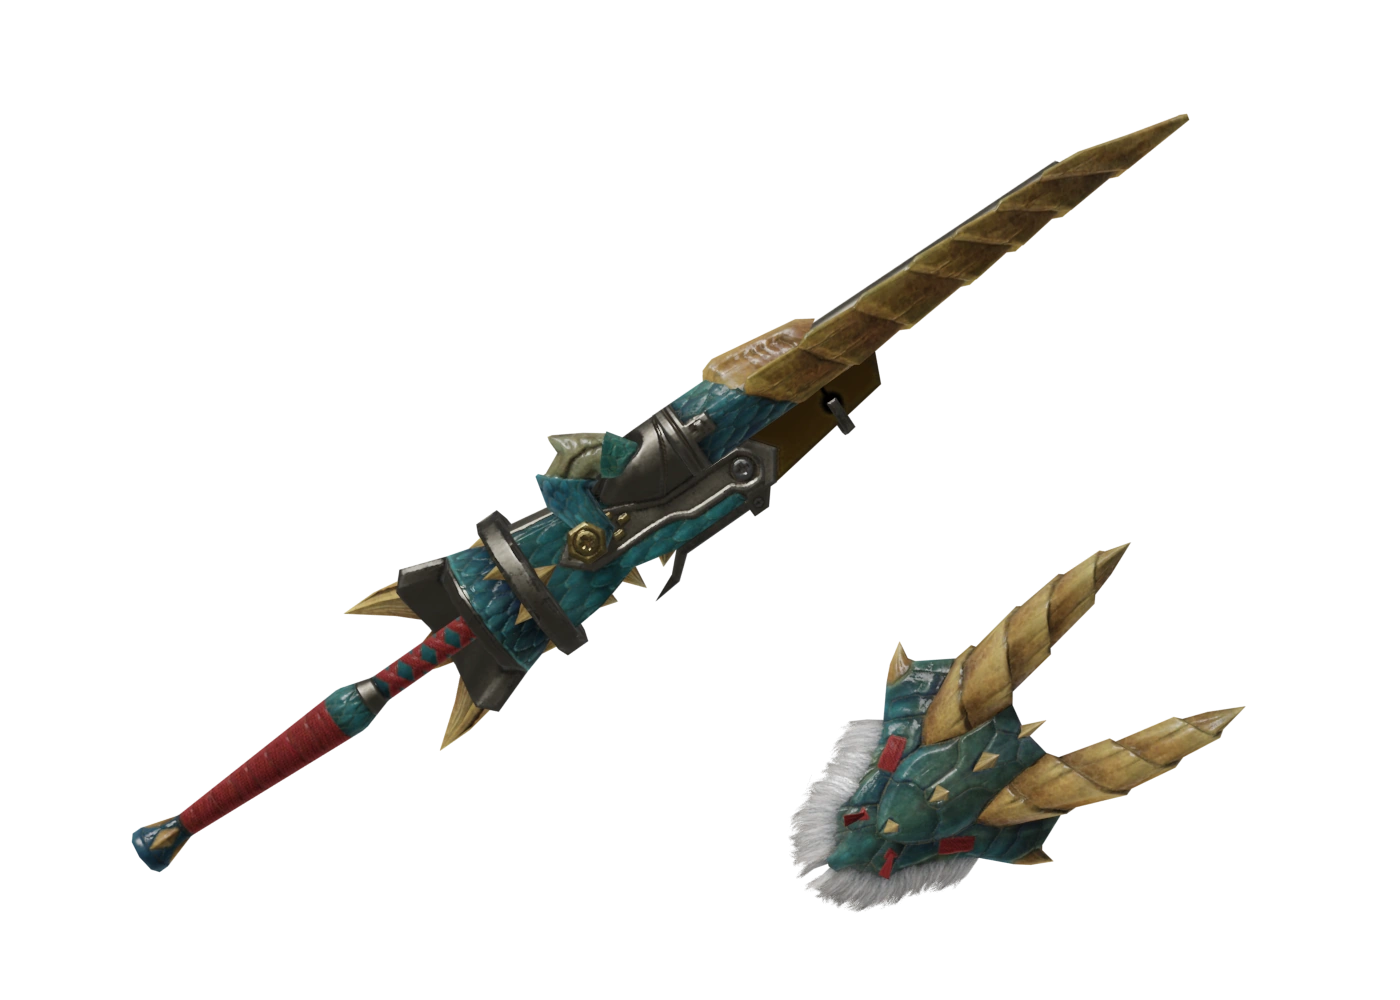
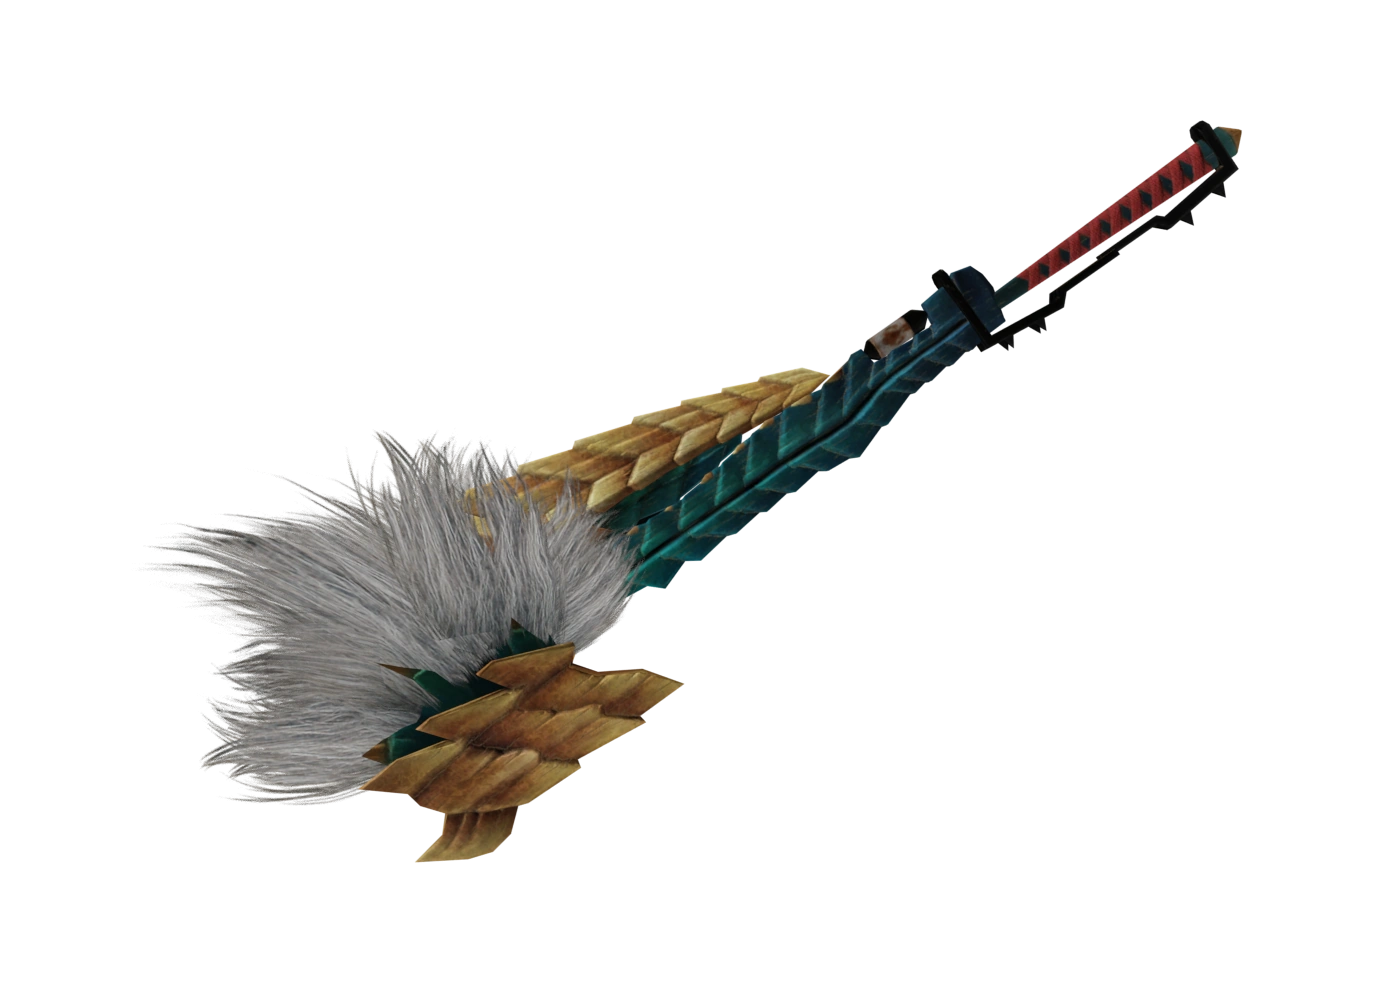
Monster Hunter Generations Weapons
|
| ||||||||||||
|
| ||||||||||||
|
| ||||||||||||
|
| ||||||||||||
|
| ||||||||||||
|
| ||||||||||||
Monster Hunter Generations Ultimate Weapons
|
| ||||||||||||||||||
|
| ||||||||||||||||||
|
| ||||||||||||||||||
|
| ||||||||||||||||||
|
| ||||||||||||||||||
|
| ||||||||||||||||||
Monster Hunter World: Iceborne

Monster Hunter Online Weapons
Sword and Shield
Weapons Gallery


Armor
Monster Hunter 3 Ultimate Armor
Zinogre Armor / ジンオウシリーズ
| Zinogre Armor / ジンオウシリーズ | ||
 |
| |
| Blademaster | Gunner | |
Zinogre X Armor / ジンオウXシリーズ
| Zinogre X Armor / ジンオウXシリーズ | ||
|
|
| |
| Blademaster | Gunner | |
Monster Hunter 4 Ultimate Armor
Zinogre Armor / ジンオウシリーズ
| Zinogre Armor / ジンオウシリーズ | ||
|
|
| |
| Blademaster | Gunner | |
Zinogre S Armor / ジンオウSシリーズ
| Zinogre S Armor / ジンオウSシリーズ | ||
|
|
| |
| Blademaster | Gunner | |
Zinogre X Armor / ジンオウXシリーズ
| Zinogre X Armor / ジンオウXシリーズ | ||
|
|
| |
| Blademaster | Gunner | |
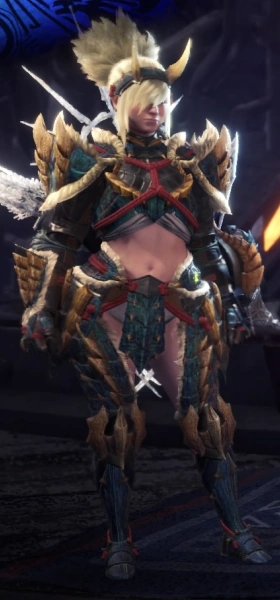
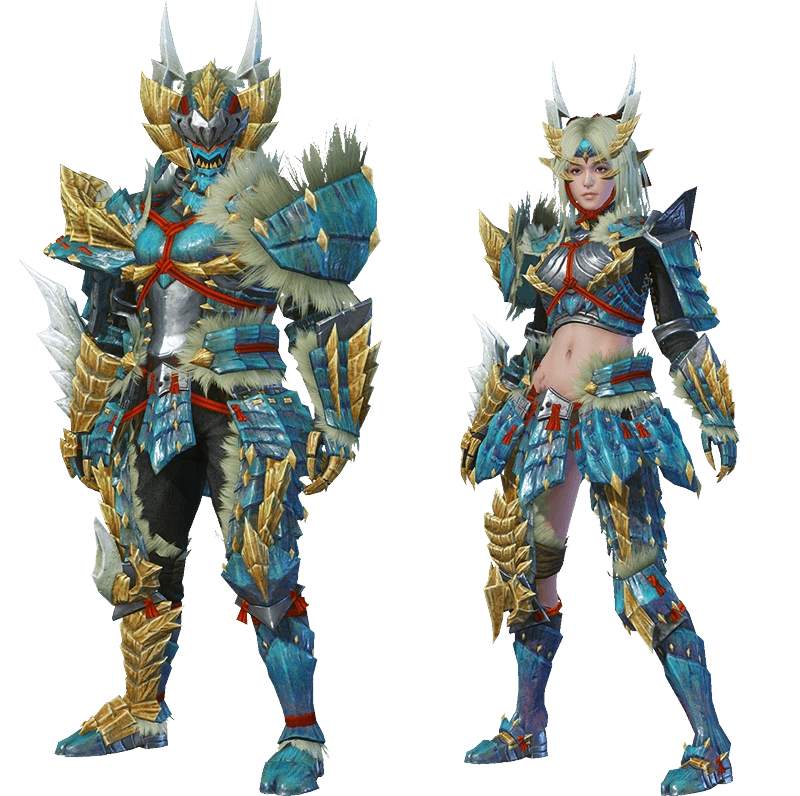
Monster Hunter World: Iceborne Armor
Master Rank
| Zinogre α+ Armor EXジンオウαシリーズ |
|
| Skills |
| Zinogre Essence: Latent Power Secret (3) Latent Power Lv 7 Thunder Attack Lv 5 Power Prolonger Lv 3 Recovery Speed Lv 2 Critical Boost Lv 1 Normal Shots Lv 1 |
| Zinogre β+ Armor EXジンオウβシリーズ |
|
| Skills |
| Zinogre Essence: Latent Power Secret (3) Latent Power Lv 7 Power Prolonger Lv 2 Critical Boost Lv 1 Recovery Speed Lv 1 Thunder Attack Lv 1 |
Monster Hunter Frontier G Armor
Zinogre Armor / ジンオウシリーズ
| Zinogre Armor / ジンオウシリーズ | ||
 |
 | |
Blademaster
|
Gunner
| |
Monster Hunter Online Armor
Zinogre Armor / (?)
| Zinogre Armor / (?) | ||
 |
 | |
Blademaster
|
Gunner
| |
Zinogre S Armor / (?)
| Zinogre S Armor / (?) | ||
|
|
| |
Blademaster
|
Gunner
| |
Zinogre R Armor / (?)
| Zinogre R Armor / (?) | ||
|
|
| |
Blademaster
|
Gunner
| |


